In Search of CAD Designers

In my last post, I listed these items as my next steps:
1 Research 3D designers
2. Meet with each designer in person or via email
3. Send them my Afro Babies image and the specs and type of toy I have in mind
4. Work with the designer on getting the design correct and the colors of the outfits and phrase on the Afro Babies sign in place for mass customization
5. Send it off to Shapeways and other 3D manufacturers for a quote
6. Get the prototype made
7. Get the design photographed and begin to test its market viability

Prof. Zoe responded:
Your vision is great though I’m not sure it’s feasible to expect to make a product in such a short time. I’d break this down into something that you can actually accomplish. For instance, the first three steps seem like they could take you a long way toward your goal, and could be accomplished in the weeks ahead. perhaps you might add into that some research with other toy designers whose experience you might learn from, so that you don’t have to reinvent the wheel. Looking forward to seeing what you do.

As a result, this week I focused on steps 1 through 3. The following post outlines my process.

I sent emails to seven designers I found on the “3D Modelers for Hire” forum on Shapeways.com.

This is the email I sent:

I am trying to make a character. I have the image (It is attached).
I think the figure should be 3 inches tall and no more than 1 and 1/2 inches wide (at the base – the feet) would be the biggest.
Please tell me what is needed to give me a quote and estimated time to complete the design.
I am enrolled in a 3D printing class at Baruch College and this is a part of my project.

I sent my request to the designers who featured human faces and realistic characters in their portfolio. One of the persons I contacted was a man I met at the 3D Design Expo at the Javits center a few months ago. I talked with him when he was in the exhibit area holding several of his designs. I remember being intrigued by his “Success Kid“.

His name is Ryan Kittleson and his designs are incredible in details. He is especially adept at creating life-life faces. You can view more of his work here

The response I received from Ryan questioned how I wanted the flat sticker image taken into a 3D model. His reply: One concern is that it’s a very flat, graphic character, so there’s always some different ways of interpreting that in 3D. Depending on how particular you are about how it gets interpreted in 3D, the cost could be quite variable. If it takes a lot of back and forth between us to find the right 3D interpretation, it will cost more of course. However, if you don’t have a specific look in mind for how I sculpt it, I could get it done quite quickly and for not too much money (probably just about $200 on the low end)

Also, I heard back from Andrei Radu of BSK Designs team, Cheap 3D [email protected]. Our interactions were as follows:

Andrei: Does the model need to be flat with the outlines extruded?
Me: I need it to be a real “doll” type character. More like the way the attached character looks. Does that help?
Andrei: OK, for this kind of result we would need a front and a side view, similar to the one in our attachment.
Me: I do not have design skills and would need someone to make these sketches for me. I only have the sticker image that my friend’s husband (now deceased) drew.
Are you able to draw this or recommend someone I could work with?
Andrei: We are able to draw too, but just from the image you sent us, it is hard to guess the details as the image is something very flat and cartoonish, with almost no details to be interpreted.
Me: Do the images I sent of the toy figure help? Any suggestion on how I work with someone to explain how I need it to be drawn?

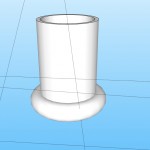
Below are the sketches he sent me to show the type of drawings he wanted me to supply. Beneath those are the images of a toy I sent him to show the type of body I am looking to have made. It is obvious that getting someone to take my flat sticker to a 3D image is a difficult design assignment.
torcoal(1)

Boltil

IMG_0275

IMG_0273

IMG_0272

IMG_0271(1)

The other designer who responded to me asked some very thoughtful questions that provided me with new langauge by which to express my needs. He replied:
Hello, I am Silvanus, 3D modeler from Shapeways forums.

I am pasting here the same text content of the PM I sent you in reply to your PM, at Shapeways. Just in case you preferred my answer being by email :

Hello.
I only have here one big doubt. You want the figure 1) as if it were a flat surface, kind of extruded flat silhouette, is it?
Or 2) Do you want actually a complete human figure, just stylized like it appears in that drawing, (with that graphical style) but having round section for arms, etc, I mean, being it a real figure with all volumetric, round surfaces? (a real human figure)

The first case would be the logical thing for an insignia. But I don’t know which is the purpose, please let me know if it is the first or second case..

If it is the first case, 60 $, and time frame: Right now is 23:27 in the night, here. So I’d make it during the day tomorrow, probably in my GMT +1 time, at lunch, or maybe along the afternoon – evening, as latest.

If it is the second case, 135$ and time to deliver, surely tomorrow night (in my GMT + 1 time)
Would you need it sooner?

In the case it is a flat silhouette (first case), just extruded after the more laborious work of tracing it, I need also to know if you want the internal black lines to be like carved or bumped instead. Consider we are doing this single color (ie, grey metal finish), and “black” is not seen as black. Unless you expect to print in the multicolor material -just consider that material is surely the most fragile of all. Ok only for decoration-

I can totally provide any model you wish be it the first or the second case. Just let me know if you would agree with these terms, and please clarify me if possible the questions I’m asking here, and then you will most probably have it by tomorrow.

Oh, I receive payments by Paypal, but can use a collection of other methods.

I responded:
I am looking to convert the flat image to a complete human figure with round section for arms. I do need a real figure with all volumetric, round surfaces. (a real human figure).
Please see the attached figures. I want it to look something like that about 3 inches tall and the feet about 1 inch long.
Does that help?

Notice my use of the term “volumetric.” I was happy to use the terms he had provided. It will help me shape my future communications with designers.

I have not heard back from Arthur Autz at the Zahn Center for Entrepreneurship @ City College. He was listed as a resource in Blackboard as one of the 3D printing options.

My preference now is to have Ryan make the model. I love his work and if he can take the Afro Babies from their current cartoonish look to a human cute kid faces, I would be very happy. I think he gets it. I might have Santiago do a design for me to to be able to compare their work. I might get Santiago to work on a different Afro Babies design.

Next week I think I will be able to focus on step 4: Work with the designer on getting the design correct and the colors of the outfits and phrase on the Afro Babies sign in place for mass customization.

I expect this to take a minimum of four weeks to accomplish. During this time, I am also researching other 3D manufacturing toy companies as Prof. Zoe suggested. In my next post, I will discuss my findings from that exploration.

There Are Plenty of 3D Printers, But, Where Are all the CAD Designers You Need for Them?

Each day, it seems, a new faster, cheaper, higher performing 3D printer comes to market. In addition, there are numerous articles about different materials and unique designs and products being created using the 3D printing technology. Thus, by all accounts, the 3D printing market is booming.

But, for this technology to really take off, it has to become very easy to use. As easy as a printer or a microwave oven to gain consumer adoption. For now, it’s growth is limited by the software or the need to know the software in order to make the printer work.

Unlike, the laser or dot matrix printer, that only required a user to know how to type on a computer to make the printer perform, the 3D printer requires rather sophisticated knowledge of difficult computer-aided design (CAD) software. It is “difficult” unless you have both design skills, animation skills and engineer skills, in my opinion.

This seems to be the major hurdle of 3D printing adoption – the need to know CAD deign.

My journey is to find a 3D CAD designer who can help me turn an idea and an image I have into a 3D design. It is not easy. I have approached Professor Monica Dean who said she will put me in touch with the professor at City College. They develop designs for people as a revenue stream for their department. Also, the evangelist from Shapeways says they put people in touch with 3D designers who can turn their idea into a 3D design. Also, I will check with the freelance designer website and post a job for a 3D designer.

So basically the desire to use and make a product using a 3D printer is limited by one’s access to to 3D CAD designers. Until that barrier is addressed and made easy, this will continue to limit 3D printing purchases and use.
In order for me to accomplish my goal to bring my product to life, I will first need to find a 3D CAD designer. I have the image, I know the specializations but I do not have the skills to take the flat image of my Afro Babies and make them into a prototype.

My mission is to hold this product in my hand as a 3D item and then mass customize its production through a 3D printing company. I am ready to begin this journey. On my next posts, you can follow it with me.

My plan is as follows:
1. Research 3D designers
2. Meet with each designer in person or via email
3. Send them my Afro Babies image and the specs and type of toy I have in mind
4. Work with the designer on getting the design correct and the colors of the outfits and phrase on the Afro Babies sign in place for mass customization
5. Send it off to Shapeways and other 3D manufacturers for a quote
6. Get the prototype made
7. Get the design photographed and begin to test its market viability

AfroBabies - LoveAfroBabies

My Intro to the 3D Printing Experience

I was sent an article by a friend about a man who was manufacturing using 3D printing and saw a banner ad link about a 3D printing event at the Javits Center.  The ad talked about how 3D machines allowed you to manufacture products.

I was immediately intrigued! I knew I had to learn more because if the company I read about was able to manufacture in Brooklyn, then so could I. Years ago I had a toy company and did all my manufacturing in China. I hated those long 22 hour flights I took at least four times a year and disliked  being on the flip side of the Eastern time zone. Manufacturing in the U.S. appealed to me. Maybe, I would consider getting back in the toy business.

But first, I needed to learn about 3D printing. I saw it as my way to enter the toy business.

I attended the Javits Center 3D Printing event and was hooked. Then, in the same week, New York 1  featured a story about a company  in  a design space who was making spoons for babies using 3D printing. New Lab Design.   This prompted me to send the following email to Macro Sea, the company responsible for building out the design space featured in the news report:

Hello,

I just saw David Belt and Scott Cohen featured in NY1 and I am reaching out to you because I would like to be considered as a business to join your beta group at Macro Sea.

I am trying to manufacture a product with 3D technology and am in the middle of writing a business plan for a new company that would produce products using 3D manufacturing.

I am excited because when I was in the toy business in 1985, all my products were manufactured in China. I attended the recent 3D Printing Conference and Expo at the Javits Center and saw all the possibilities of true just-in-time inventory and the ability to manufacture to real-time market needs.

To know that you are in the Brooklyn Navy Yard, which is in walking distance from my home, is a great coincidence.

I would like to talk with you about possibly being a part of your beta group of companies and tell you more about my company and its products and mission.

Please let me know how I can make an appointment to meet with David Belt or Scott Cohen. I am including my resume (which does not include my new business venture), but gives you an idea about my capabilities and community involvement.

I look forward to hearing from you soon.

I included my phone number and received a call from one of the directors of the company. She then put me in touch with the president of Terreform One, Maria Aiolova.

She is a very accomplished architect and designer and her company is “a non-profit design group that promotes smart design in cities.”

We talked about design and 3D printing. I told her about my interests and we continue to communicate. I send her articles about 3D printing and am planning to meet with her in November about some new 3D printers they will have.

During this same time, I saw a CUNY post about Business Meets 3D Digital Design and met Prof. Monica Dean who was at the Javits 3D event at Baruch during a seminar I was  attending.

I learned about the course and was excited to know that I could take my 3D curiosity to another level and actually be taught about it! Cheers and excitement!


Future Vision – Making 3D Printing Useful

Developing and manufacturing toys fuels my interest in learning about 3d printing. I am intrigued with the manufacturing ease it presents and “the ability to make things from your desktop without your having any tools of your own or stepping into a factory.” This line from the Maker book sums up 3D printing’s appeal.

When I was making toys, my business model required expensive molds, costly letters of credit, high factory-imposed minimum order quantities, custom broker contracts, container-load overseas shipping costs, warehousing expenses and unreliable product sales forecast. 3D printing upends and disrupts that process.

It presents the ability to manufacture in small batches, design a product using software, test variations on a design without mold cost, manufacture against demand, use low cost equipment or order online, customize items according to individual consumer’s specification and provide a better customer experience.

These factors make reentering the toy business a possibility for me. The lack of high capital cost and the ability to test market makes experimenting easier.

Currently in the toy business, children have been empowered as the designers. They can select the design they want, change it to their liking and print it at home. Likewise, people are able to have their exact images produced as toys. 3D printing allows for children to live out their fantasies by having a replica of their face imposed on the body of their hero or heroine.

By manufacturing with 3D printers, small companies are able to find their niche without heavy marketing and promotions costs and one can make “mistakes” without it being financially crippling.

Moreover, 3D printing permits toys products to come to market faster limited only by the ideation process and the computer-aided design.

While the 3D printers have opened up many manufacturing possibilities for toys, the one area that seems to be lacking is the access to CAD designers. For a novice, the software is hard to learn. I would like to find the network of freelance CAD designers who can help take ideas and create the 3D mdel needed to get them produced.

These are the sources I have used:
http://www.forbes.com/sites/ehrlichfu/2013/10/29/our-future-with-3-d-printers-7-disrupted-industries/

http://venturebeat.com/2013/08/20/coca-cola-3d-printing/#RSDEmM0Cku4iLbSt.02

https://www.shapeways.com/blog/archives/1964-designer-spotlight-wayne-losey,-3d-printed-toy-designer.html?%2Farchives%2F1964-designer-spotlight-wayne-losey%2C-3d-printed-toy-designer_html=

http://www.technologyreview.com/view/421470/how-3-d-printing-is-transforming-the-toy-industry/
http://www.forbes.com/sites/ciocentral/2012/12/07/manufacturing-the-future-10-trends-to-come-in-3d-printing/

http://www.technologyreview.com/view/421470/how-3-d-printing-is-transforming-the-toy-industry/

Personal Reflection – What I’ve Learned So Far…

The five things I know for sure now:

1.The most difficult part of the course has been the design challenge.

2. Being paired with design students is wonderful. They are artists with skills I appreciate. I am a clunky sketcher and they are smooth.

3. Learning CAD design is hard stuff. But, being able to pull up a section of a drawing of a rectangle to instantly create a roof is really cool.

4. The Maker book is really well written and entertaining. I bought the hard copy, the Kindle version and the audible book.

5. The Jump creative process is an interesting ideation method for product development. I find it refreshing that it starts with empathy.

My unique take on the experience is that it is experiential learning. It involves learning new software, constructing designs, reading articles and books, meeting with a group in brainstorming sessions,sharing insights and following a vision with segments of the steps presented on a just-in-time fashion.

The design challenge has required me to look for books about sketches in art stores and watch inadequate tutorials for Sketchup. If you have only drawn stick figures throughout life, quickly learning to design in a highly advanced CAD program is like learning how to play concert No. 2 in F minor as the first introduced to a piano. At least for me. To overcome this challenge, I practiced the videos over and over. I wish Lynda.com took on Sketchup.There is too mucha assumption in the tutorials about the level of the person using the software. This product screams for a 101 level video tutorial. Bring on Sketchup for Dummies!

My strengths are research and writing. I bring to the group many different resources and information about containers to help spark ideas. Ideation is a strength I am developing as I search for inspiration for this project.


Studio Exercise 2 – Five Forms & Five Materials


1. Rabbit Cookie Cutter
Size: .73” wide
.18” depth
.96” height
Design: .stl
Materials: Coral Red Polished plastic
Estimated price: $3.22
Manufacturer: Shapeways
Production schedule: 6 days

2. Knob Specs
Size: 2.2” wide
.70” depth
3.7” height
Design: .stl
Materials: Ceramic glazed
Estimated price: $23.75
Manufacturer: Shapeways
Production time: 8 days

3. Vase Specs
Size: 4.7” wide
4.7” depth
5.4” height
Design: .stl
Materials: Antique Bronze Matte
Estimated price: $3,131.41
Manufacturer: Shapeways
Production schedule: 10 days

4. Ring Specs
Size: 2.8” wide
2.9” depth
1.1” height
Design: .stl
Materials: Ceramic glazed
Estimated price: $10.44
Manufacturer: Shapeways
Production Schedule 13 days

Afro Babies Phrase Specs
Size: 5.9” wide
1.5” depth
2.7” height

5. Materials: Chocolate
Estimated price: $3951.71 (for the first one – not amortized)
Buy Choc Creator V1 – cost – $3,916.71
Cost of chocolate – 4 lbs cost – $35.00
Production schedule: 1 day

Studio Exercise 1- Sketchup or Entering the CAD World

I created two 3D images using Sketchup. It is a computer animated design (CAD) program to help you create images that can be printed on 3D machines.  With this free program you design on the computer and you convert your images to a STL format. Like pdfs are a format for text to be displayed, a STL can be ‘read” by a 3D printer to enable your design to be ‘printed’ into a product. It is a universal file for all 3D printing and the standard for the industry.

The Process:

I was given a small block and my assignment was to sketch it first on paper in showing three different views. Next I was to use the tools in Sketchup to design a 3D model of the block. It is below.

My next assignment was to  take my block and eight different images that had been created by other students to create an original  design. I went to the 3D Warehouse, which is a location within Sketchup where we were able to save our design.  I first started with the double cube block that I designed and uploaded all the other images.I had difficulty determining if I had all nine of the images because they looked alike in the 3D Warehouse.

The Challenges:

The difficulty I encountered was how to keep the images from moving when I needed them to remain in one location. Also, the tool used to rotate the images was difficult to control. To overcome this, I reviewed the video tutorials. Since I am not a designer, I was a little intimidated by the task of trying to figure how to use these shapes, cubes, triangles, rectangles and create something recognizable.

Results:

I have several rubber ducks on my desks that were gifts. Therefore, I decided I would try to make a duck. But, because I had the constraint of these geometric shapes,  I knew I would have to make an abstract duck. I tried to show the image with the beaks and the tail to give it shape. The duck also has a rooster component indicated by the cylinder and the half cylinder crown. My figure is significant because it was the first time I used this software and any CAD design. (See below) What I now know is CAD design 101 at very rudimentary level.

Advice:

The first advice I would give someone is to study the Sketchup tutorials and watch the videos and go through the processes to learn how to use the tools. The first thing I did was to configure the tool bar to show the names of what each tool represented. This “cheat sheet” helped me to keep track of what each tool represented. I would advise someone to learn a few of the tools really well. The tools I used the most were : a) push/pull, b) arrow, c)eraser, d)move tool, e) rotation, f) paint, g) magnifier and h) hand tool. I found these were the tools that are used the most in order to get familiar with Sketchup.


ye- double cube


ye 3D structure with shared bricks -v