Mini Storage (For the little things)

unnamed

Materials:
Cardboard box
Painter’s tape or Colored Contact paper works better.
Ruler
X-acto Knife or Box cutter.

Instructions:
1. Any cardboard boxes laying around? Good, you can use that!
2. Measure & mark the size you want it to be.
3. Slice it up with the X-acto Knife
4. Decorate the whole thing with your fancy tape or contact paper
5. Measure & slice a piece of cardboard for the middle piece to make the two shelf storage.
6. Tape it up (maybe even slice a hole on the side & attach to the middle piece to make it secure)
7. Have a tray-like piece of cardboard for the bottom, so it can slide in & out easily.
8. Close up the top shelf with cardboard so things don’t fall.
9. Tada! You now have a mini storage for all your nail polish or your girlfriend’s, mom’s or any woman.

First of all, you can store about any little things you want in this mini storage, not just nail polishes. However, I made mine for that purpose in mind. The box I used was the Despicable Me Fruit Roll-ups cardboard box. Since I devoured all of its contents, I decided to make something out of the box. I have been looking for a place to store all of my nail polish neatly in a more organized manner. I believe I have found the solution. This mini storage, not only stores ALL of my nail polish, it prevents clutter in my drawers because prior to making this, all my nail polishes were scattered everywhere inside my desk drawer. I am certain that you or someone you know does the same thing and randomly throws all their nail polish into some drawer. If this is the case, I present to you this great solution! In the above picture, I did not quite finish decorating or covering every surface of the box with tape, but you get the picture.

Make sure you have a plan for the size you want the storage to be because I did not have one when I started. Therefore, I just started out by cutting the whole box in half  thinking that I would make two of these mini storages. However, you can see that the top is not covered so this does not prevent dust from getting in there. If I were to make this over again, I would cover the top with a lift-able roof for protection from dust. I can still do this, but it is harder because some of the nail polishes are taller than top. I will probably cover it with plastic wrap for now. Anyway, this simple to do tutorial is great because you can make this out of materials you already have at your house, reuse some of those cardboard boxes, and even give it to someone who would greatly appreciate it. I hope you have enjoyed this tutorial, I am looking forward to your comments!


Girl Stuff! DIY Jewelry

IMG_1767
A few jewelry pieces I made.

All of these supplies can be purchased from art supplies & hobbies stores. I purchased all of mine from Toho Shoji New York and Beads World. Both stores are directly across from each other between 37st & 38st near Bryant Park.

Materials:
1) Chain – Varies in price. Is charged by $ per foot therefore, buy the length you need.
2) Jump Ring (circles) comes with a lot.
3) Clasp – secures it like a lock. I personally like the Lobster clasp, as shown in the picture.
4) Pliers. Can purchase at hardware store or hobby store.

Instructions:
1) Measure and cut the chain to the length you desire using the pliers.
2) Open two jump rings & attach to both ends of the chain.
3) Close one of them.
4) Put a clasp on the open one & then close it.
And it magically becomes whatever you set out to make!
Tip: Sometimes, the chain is too thick so buy some pendant holder/slider so it can move along the chain.

My inspiration for making my own jewelry pieces are inspired by my mother. She has always been addicted to beads, jade, and anything else she can get her hands on. I walked past one of the stores mentioned above, and peered inside about a few months ago. It did not take long before I decided on checking it out just out of curiosity. First, I observed that there were many unique chains to choose from, lots of beads, and supplies to create costume jewelry or accessories. In comparison with the fashion jewelry stores, I believe it is much less expensive to make my own at $1 to $3 each to the $10 or more each that those stores charge. There is some initial investment for the supplies, but there will be a lot of each remaining, such as the jump rings. In addition, I like that I can make my own decisions about what I want on my accessories. I know that it looks very simple and plain, but that is how I like it. It really is as easy as it looks, and it only requires some effort on your part. Be careful to measure it to the perfect size, and secure the jump rings properly. These custom made accessories would be nice, inexpensive gifts for your love ones during the upcoming holidays, especially if you have little female children in your family such as siblings, cousins or nieces. However, this tutorial is not just limited to women. There are cool looking, thicker chains for men also in those two stores, and the same instructions can be used. Happy jewelry/accessory making!

Popsicle Phone stand

SAM_0331

Materials:
Glue or Mod podge (I used mod podge because it comes out clear and I like it better)
Wooden popsicle sticks (brought a pack of 100 for $1 at the dollar store.)

Instructions:
One phone stand can be made with half a pack – around 50 sticks.
1. Divide the pack in half if it did not come that way.
2. Measure the amount of sticks for the platform and back depending on the size of your phone.
3. Start by building the  platform first, then the back, then the support beams.
4. As you go along keep arranging the sticks until it suits your liking.
5. If you like the way it looks, glue it together (If using mod podge, take ONE popsicle stick & use one end of it to apply glue to the others)

-This tutorial is created so that you can make your phone stand look the way you want it to look. Customized specifically for your phone (Mine was made for the Samsung Galaxy Note 2, therefore, it is the exact size for it.)
– The key to making this phone stand is that you must create a solid platform, back, and support beam.
– The most important part is the back side of the phone stand, I enhanced mine with a “X” using the popsicle sticks to make it strong against the weight of my phone.
– The slanted support beams are so I can place my phone sideways on it.

It is one of those days, it is never a proud moment, but one you will enjoy. What do I mean by “one of those days?” It is the middle of winter, the rain is pouring down. Anyone stuck in the middle of the weather is doomed to be soaked by the downpour despite having an umbrella. This is a day to sleep in if there are no duties to attend to, a day of rest and relaxation. To increase your comfort level, you have this great tool next to your bedside that represents the throne for your phone. This simple phone stand is all you need during those mornings that you do not quite feel like leaving your bed just yet, to the cold air that awaits you from the moment your feet touches the floor. You can place your phone either standing up or sideways to watch your favorite shows or movies. I use the Netflix app, Hulu app, and different websites to watch a variety of shows.
This is only one potential reason to have this, other reasons would include:
– Charge your phone on it.
– Place your phone on it next to your desk for easy access.
– Know where your phone will always be (I tend to misplace my phone somewhere and forget where it is, leading to a scavenger hunt) so this helps.
– If you don’t want to use it for your phone, you can put charged phone batteries, jewelry, keys, any small items on it.

I am sure you can think of more reasons to make this popsicle phone stand. This easy to make phone stand is useful, simple to create, and does not take a lot of time. It may not come out to be perfect, but nothing is ever perfect, so start building your own!

8-bit pixel art: Let em’ explore your room

Pokemon
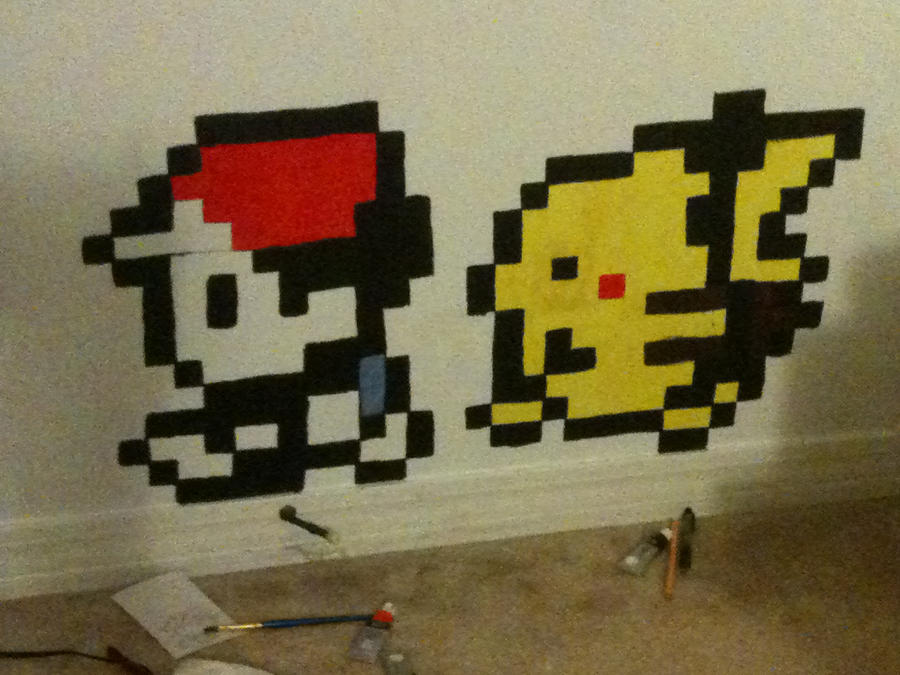
Wall painting of 8-bit Ash & Pikachu. Courtesy of Zeldaaa11 from Deviantart.com

My version using construction paper.

Materials:
1) Construction paper
2) Glue Stick
3) Printer Paper
4) Ruler
5) Tape

Instructions:
1) Measure & mark 1×1 inch squares on different colored construction paper. (Should look like a grid when completed).
2) Cut all the squares out.
3) Lay out 4 printer papers (varies) & tape it together to create the background to glue the pieces onto.
4) Glue the pieces down like you would a puzzle, but the pictures can be used for reference.
5) Lastly, cut out the white printer paper background that is uncovered by the pixel art.
6) Tape them anywhere you like!

  • Ash requires: 77 black, 40 white, 19 red, and 2 blue squares.
  •  Pikachu requires: 75 black, 74 yellow and 1 red square.

I grew up loving Pokemon, and I am sure it was the case for most of you also. It was a great source of entertainment for me. From the Saturday morning television show, collecting my own deck of Pokemon cards, to playing the red, yellow, and blue versions of the Pokemon video games on various game consoles, including the Gameboy Pocket, Gameboy Color and the Nintendo 3DS. Last year, I brought the Pokemon Black version 2 and it is still as awesome as I remember it to be. I taped the 8-bit Ash and Pikachu onto my door because it is a nice decoration to my otherwise, normal room and provides a great reminisce of fun times during my childhood. Anyway, you can create your own wall art for any character by converting it into pixels with MS Paint or Photoshop (learn to do this with Youtube), and following the instructions above. My inspiration to create this wall pixel art originated from a wall painting belonging to Zeldaaa11 from Deviantart.com. The difference are the materials I used to create mine. It takes time and patience, but the rewards of memories comes along with it. In addition, it can be a conversation starter for when people come over to your place.  Thank you for reading, and I hope you enjoyed this tutorial. Best of luck on your own project!

Coasters: Put a cup on your face

My boyfriend & I(:
My boyfriend & I

Materials:
1) A printed picture (printer paper or the glossy photos)
2) Mod Podge: Matte-Mat-Mate
3) Bathroom tiles (only 20 – 30 cents per tile at Home Depot)
4) Clear sealer spray

The process to making these coasters:
1) Print out or have your photo ready.
2) Glue down your picture to the tile with the mod podge (use a credit card or ID to remove air bubbles) & wait until it dries.
3) Put a layer of mod podge to cover the tile & wait until it dries.
4) Repeat step 3 about 2-3 more times.
5) Spray your sealing adhesive over it (Warning: do this outdoors & provide an open space to allow it to dry due to its strong smell).

Here are some coasters I made, perhaps a whole year ago. They’re still holding up very well! At the time I made these, I just wanted to test it out to see how it would turn out, which explains why I used black and white printer paper. I simply needed them desperately because I found out, sadly that my newly ordered desk produces bumps from traces of water left on it (yes, I know… I really should have shelled out more for a better desk).  I always place my hot/cold cups and bowls of anything on these coasters whenever I eat and drink in front of my desk now. Anyway, they were fairly easy to make, and it can be great personal gifts for the love ones in your lives. Making these requires  a bit of patience, but I know you can do it!