Multimedia Reporting (Summer 2020)

Class Agenda: Wednesday, August 12

Last day of class!

Before we screen your videos…

Discussion: The Business of Multimedia Journalism

Learning how to come up with a story, report that story, compose a photograph, mix sound, and shoot B-roll and then put it all together into a clear and cohesive story is only half the battle. Something that often gets left out in school is the practical side of how to make a career out of this. Sure, you might get a good internship while you’re still in school and then get hired and start working your way up. But there are a lot of different ways into the industry, and a lot of them involve taking a little bit of initiative. I’d venture to say that most journalists I know have freelanced at one point or another.

Freelancing can be a great gig, and it can also be terrifying when you’re first starting out. Here are a few common issues freelancers often run into:

Do I need a website? YES. Showcasing your previous work is more important than any well-crafted resume. The importance of being able to refer an editor to a slick portfolio website cannot be overstated.

How do you know how much money to ask for? It’s easy to undervalue your skills when you’re first starting out, but it’s worse to ask for too little money than to ask for too much. Some publications have set rates: a flat rate for a certain kind of story, or a day rate, or they’ll pay by the word. In other cases, there’s room for negotiation. If you’re not sure how much to ask for, consult your colleagues. Always try and get them to reimburse expenses.

What’s the deal with taxes? You still have to pay them. You’ll become very familiar with the 1099-MISC form. Keep your receipts so you can write off as many business-related expenses as possible: Equipment, plane tickets, etc.

How do you make sure you get paid in a timely manner? Send an invoice as soon as you file the story. I usually ask the person receiving it to confirm they’ve received it and to tell me when I should expect the money to arrive. If they don’t respond, follow up early and often. “Polite but incessant” is my motto.

I can’t use the school’s programs anymore. How much is it to buy Adobe Premiere and Lightroom and all that stuff? Not actually as bad as you might think, because you no longer even have the option to buy them outright; there’s a monthly subscription service to the Adobe Creative Suite that costs anywhere from $10 to $50 a month, depending on how many programs you need.

What kind of equipment should I invest in? When it comes to still cameras, if you’re on a small budget, I usually advise people to start with a pretty basic camera body and to invest in a few good lenses if you’re going to spend money somewhere. When it comes to video, it’s become kind of an arms race out there and DSLR cameras don’t always cut it anymore. Take a look at Storyhunter assignments to get a sense of what outlets are looking for:

“C300 or C100 strongly preferred—higher end DSLRs accepted”

“Need to have a C100 or equivalent and lav mics”

“A camera capable of shooting 1080p 24fps and 60 fps for slow motion, if possible 4k video and 120 fps for slow mo”

The good news is that if you don’t have five grand to drop on a camera and audio equipment tomorrow, you can rent gear from places like Adorama and KitSplit.

I just spent an insane amount of money on my new equipment. How do I protect it? Insure your stuff! Renter’s insurance can sometimes cover your gear, but there’s usually a pretty high deductible for theft etc. If you’re planning on working internationally, insurance tends to be quite expensive, especially if you’re working in areas considered “high-risk.” NPPA members get a discount through one company, but make sure to shop around.

Freelancing is lonely. How do I meet other people in the industry? Journalists tend to be a social bunch. It’s an industry where skills are obviously important but where you can also go pretty far on the strength of your personality and on who you know. You already have a huge advantage by virtue of the fact that you live in New York, one of the world’s biggest media hubs. Make yourself known to editors and colleagues by checking out industry events like these:

ScreenUp NYC 

Video Consortium (New York chapter)

The Bronx Documentary Center

RISC Training (first aid training for freelancers who work in remote, sensitive, and conflict areas, often host events/panel discussions at the Brooklyn Brewery
risctraining.org

Resources

  • Photojournalism

The National Press Photographers Association (NPPA membership gets you certain benefits, including discounted camera insurance and press accreditation; follow them to find out about grants)
https://www.facebook.com/groups/2233179993/

Photography/Multimedia Internships and Jobs (great place to find out about entry-level opportunities)
https://www.facebook.com/groups/608650785837641/

Photo Grant Opportunities (great place to learn about grants/competitions/exhibitions for emerging photojournalists) https://www.facebook.com/groups/205928780146/

Lightstalkers/N11 (for photojournalists)
https://www.facebook.com/groups/5235712822/

Photojournalism Now (blog focused on photojournalism and social documentary photography)
https://www.facebook.com/PhotojournalismNow/

Women Photograph (a resource for female* documentary and editorial photographers and the people who would like to hire them—GRANTS!)
https://www.womenphotograph.com/

Eddie Adams Workshop (a prestigious, game-changing, three-day workshop for emerging photographers in upstate NY that puts you in a room with some of the biggest names and top editors in the industry)
https://www.facebook.com/EddieAdamsWorkshop/

The New York Times Portfolio Review (free but competitive, puts you in a room with some of the top photo editors in the world for advice and critiques on your ongoing photo projects)
https://lens.blogs.nytimes.com/…/applications-open-for-the…/

Photoville
http://photoville.com/

The International Festival of Photojournalism
http://www.visapourlimage.com/en

  • Audio Journalism

Third Coast Audio Festival
https://thirdcoastfestival.org/

Public Radio NYC Google group. Be warned, you’ll get a LOT of emails but it’s a great place to pick up transcription work and the occasional tape sync, which usually pays about $150 for a fairly easy recording gig: [email protected]
(Let me know if you’d like me to add you.)

Radio Women Rule the World (for women in radio) https://www.facebook.com/groups/1514423228769048/

  • Video Journalism

Storyhunter (online brokerage where videojournalists and filmmakers can apply for assignments)
https://storyhunter.com

Global VJs
https://www.facebook.com/groups/globalvjs/

Binders Full of Video Journalists (for female VJ’s) https://www.facebook.com/groups/1006816089433804/

  • All Media

Vulture Club (for international journalists) https://www.facebook.com/groups/197918473577006/

The NVC (the non-Vulture Club, founded by people who were kicked out of Vulture Club—long story)
https://www.facebook.com/groups/439000736155194/

Freelancers Get Your Freak On (for freelancers who work in different media and are looking to collaborate) https://www.facebook.com/groups/1021852794578554/

Journo Housing Exchange (for wandering journalists looking for short-term housing around the world) https://www.facebook.com/groups/1639458896367607/

Journalism and Trauma (a place to discuss how we as journalists engage with trauma, from how to interview someone who has experienced it to how to cope with our own direct or indirect trauma)
https://www.facebook.com/groups/468146643386958/

Ladies Writing and Journalism (for female print journalists)
https://www.facebook.com/groups/159810750800770

Binder of International Reporters (for women who work internationally) https://www.facebook.com/groups/634887219990543/

Binders Full of Digital Journalists (for female journos who work in digital) https://www.facebook.com/groups/globalvjs/

Riot Grrrls Of Journalism (global group for women who work in all different media) https://www.facebook.com/groups/1698979077092920/

  • Formal Groups/Organizations

New York Association of Black Journalists (NYABJ) https://www.facebook.com/NYABJ/

(NABJ) National Association of Black Journalists
https://www.facebook.com/NABJOfficial/

South Asian Journalists Association (SAJA)
https://www.facebook.com/South.Asian.Journalists.Associati…/

Asian American Journalists Association
https://www.facebook.com/AAJAHQ/?ref=br_rs

National Association of Hispanic Journalists
https://www.facebook.com/NAHJFan/

Arab and Middle Eastern Journalists Association (AMEJA)
https://www.facebook.com/AMEJAGlobal

Association of Health Care Journalists
https://www.facebook.com/healthjournalists

Society of Environmental Journalists
https://www.facebook.com/SocietyOfEnvironmentalJournalists

Native American Journalists Association
https://www.facebook.com/NativeJournalists

The International Association of Religion Journalists
https://www.facebook.com/The-International-Association-of-R…

Association of Food Journalists
https://www.facebook.com/AFJeats

Overseas Press Club of America
https://www.facebook.com/opcofamerica/

Society of Professional Journalists
https://www.facebook.com/SocietyofProfessionalJournalists/

Committee to Protect Journalists
https://www.facebook.com/committeetoprotectjournalists/

Blink (resource where outlets can search for and hire freelancers)
https://blink.la/

  • Funding Opportunities

International Center for Journalists
https://www.facebook.com/icfj.org/

The International Women’s Media Foundation
https://www.facebook.com/IWMFpage/

Pulitzer Center on Crisis Reporting
https://www.facebook.com/Pulitzercenter/

Open Society Foundations
https://www.opensocietyfoundations.org/


Any questions?


Video Screenings

Yuleisy:

Esther:

https://songsong.exposure.co/a-look-inside-senior-living-during-covid19?source=share-songsong

Sarah:

Alec:

Wen:

Navpreet:


Evaluations

Finally, please make sure you fill out your course evaluations!

http://baruch.cuny.edu/EVALS


Class Agenda: Wednesday, August 5

Screening and Discussion

We’ll listen to some of your radio stories and give feedback as a class.


BREAK


Practice Video Assignment

Five-shot sequence due on Monday.

The classic sequence that every budding videographer learns when starting out is the five-shot sequence.


  • Close-up on the hands.
  • Close-up on the face.
  • Medium shot.
  • Over the shoulder shot.
  • One additional creative angle.

You won’t always edit things in this exact way when you do a sequence in the real world; sometimes it’ll only be three shots, or it might be ten, and they might be in a different order. But the five-shot sequence is a useful framework for thinking about depicting an activity clearly and engagingly with video.

Editing a Five-Shot Sequence

This can be a very short video: roughly 30 seconds.

Take a short clip of the interview you filmed, linger on the person’s face for about five seconds, add a lower third identifying the person, and layer your sequence of B-roll over the rest of it. You don’t need to include too much of each B-roll shot… but remember that it’s good practice to hold shots for at least 10-15 seconds when filming, even if a lot of the time you might only end up using five seconds of each clip.

Export (Format: H.264) and upload to YouTube or Vimeo, then post on the class blog. (Defaulting to “Match source-high bitrate” is fine; if you’re ever concerned about the file size being too big, the medium bitrate is a good option.)

Upcoming Dates

Monday, August 10: Production on video stories; one-on-one check-ins and feedback.

Wednesday, August 12: Videos due. Screening and feedback as a class.

Here are a couple of videos done by past students to serve as inspiration:


Class Agenda: Wednesday, July 29

Intro to Video Journalism

With video, we build on the compositional techniques of photography and the structural, storytelling aspects of audio with one obvious additional element: Motion.

How does video storytelling for the web and mobile differ from TV and film?

  • Need to be CLOSER to your subject. Web videos are smaller and more compressed.
  • 20 percent of online viewers bail on a video within 10 seconds. So you don’t have a lot of time to grab your viewers and make sure they stick around.

How important is audio?

  • Good audio is of paramount importance. If you have low-quality video and good audio, the video will still be watchable. If you have gorgeous visuals but terrible audio, it will not.

When is narration necessary?

Sometimes, you can let the subjects of your video tell the story all on their own — as long as you edit with care, presenting what they’ve told you in a way that makes narrative sense. One benefit of non-narrated videos is that they can feel more organic. There’s no disembodied voice stepping in to tell the story, which keeps the focus on the characters in the story.

But sometimes, for clarity’s sake or for stylistic reasons, narration is necessary, or text.

Narrated videos

Text-Narrated videos

These are more and more popular thanks to social media distribution because they automatically start playing as you scroll through your feed and they can be watched without sound.

Non-Narrated videos


Shooting Your Video

There are two main components to any video: your interviews and your B-roll. The rules of composition we learned for photography (thirds, colors, patterns, symmetry, etc.) all apply here, but you also need to keep an eye out for motion. Tracking shots involve following the action with your camera, while static shots involve keeping your camera still, but that doesn’t mean there’s no motion involved; you might just be letting the action go in and out of the frame.

What is B-roll? And what difference does it make?

A big difference.

Things to keep in mind while you’re shooting B-roll:

  1. Shoot more than you think you’ll need.
  2. Get a variety of shots. Close-up, medium, wide, detail shots, static shots, tracking shots.
  3. Use a tripod whenever possible. If you don’t have one or you’re shooting in a mobile, chaotic situation, be resourceful about stabilizing your shots.
  4. Think about your interviews and let them inform your B-roll shooting decisions. Look for shots that illustrate what the person is talking about.
  5. Hold your shot longer than you think you need to. A good rule of thumb is to hold it for at least 10 seconds (AFTER it’s already steady).

Things to keep in mind when you’re shooting your interviews:

  1. Frame the shot with your subject on one of the thirds, angled so that they’re looking slightly INTO the frame. Have them look at you, not at the camera, so be mindful of where you are sitting. It’s a bit intense when someone looks directly into the camera.

2.  If you’re working with a translator, be mindful that the subject will want to look at them, so make sure they are positioned in the ideal place to draw the person’s gaze.
3.  Prioritize good audio.
4.  Make sure their face is lit, but not too harshly.
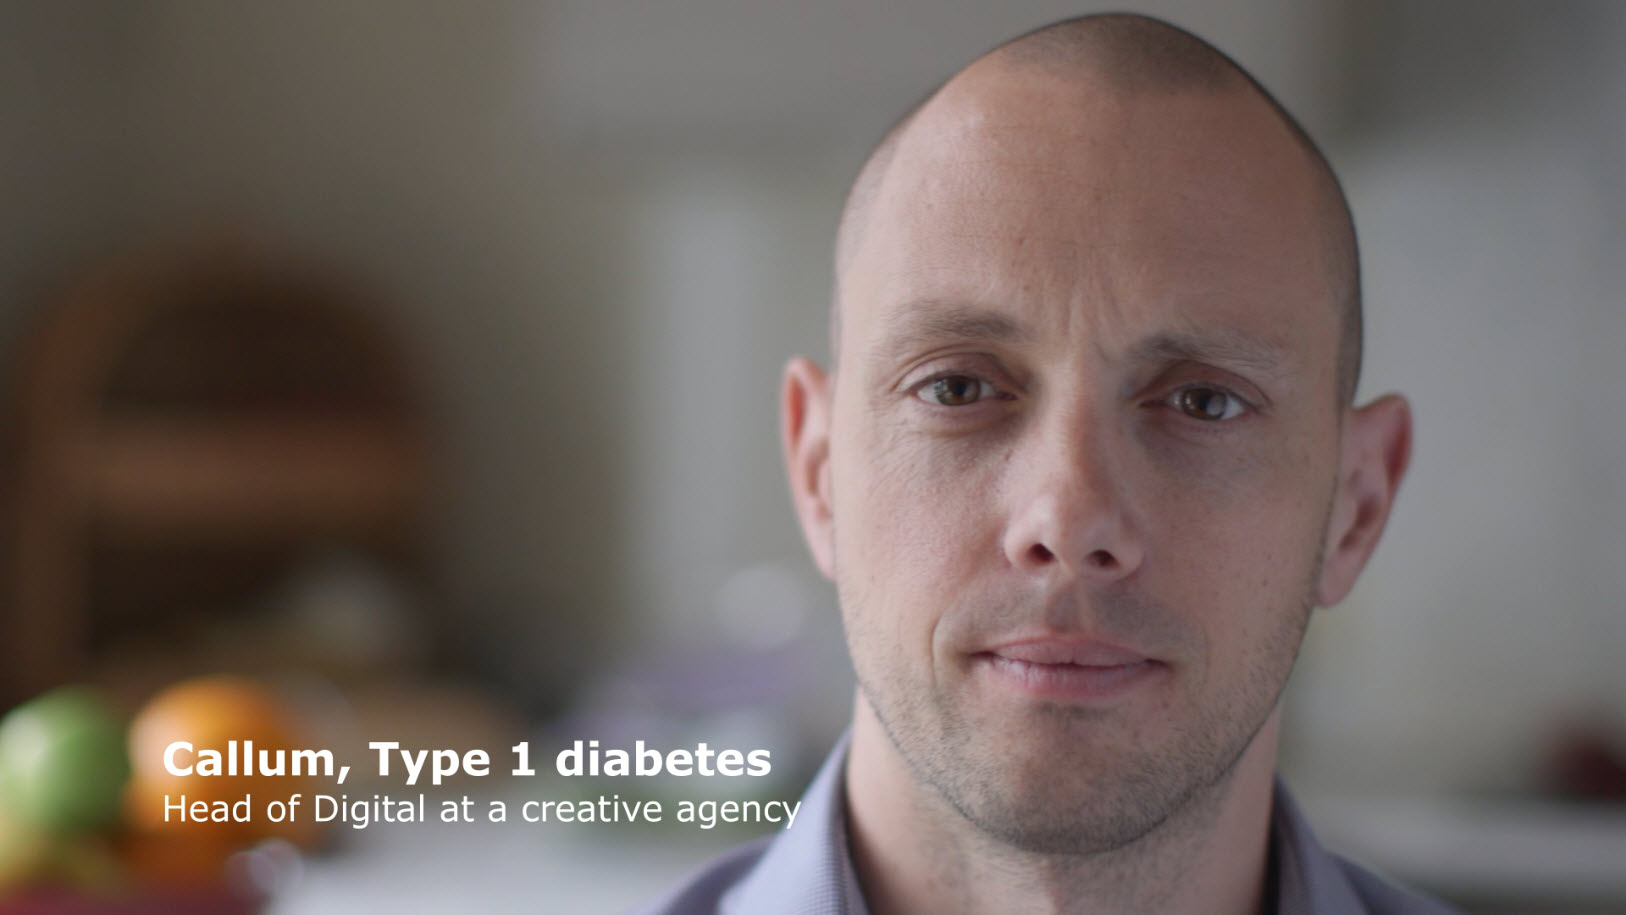
5. Think about composing the shot in a way that allows for some negative space where the Lower Third will eventually go.

Obviously, you will be a bit limited in the types of video stories you are able to do at the moment. So here are some suggestions:

  • ​Aim to find stories you can report at home or close to home. Interview people you are already in close contact with. There are also a ton of internet/social media stories right now because so much human interaction and creativity is unfolding virtually, so consider finding ways to report on this visually via screen recording tools.
  •  Ask your sources to record video on their phones and send it to you. Make sure they orient their phones horizontally. This can include interviews you conduct over the phone or B-roll/video diaries done in the moment while your source is handing out free lunches at an NYC public school, teaching their child from home while struggling to work full-time from home, working a hospital shift, etc.
  • Use the Screen Recording feature on your phones to record video from your phone screen, or select “New Screen Recording” in Quicktime to record video off your laptop screen. Use KeepVid to grab videos off of YouTube, if relevant to your story. (Make sure to attribute any videos you grab this way and make sure you only use short clips to stay on the right side of Fair Use.)
  • Go out and film only if it’s filming you can do outside by going for a solitary walk or bike ride and from a distance of greater than six feet. Don’t use your wired lav mics to interview people in these situations. Under the circumstances, it’s okay if the audio isn’t perfect. Ask the person to speak up.


BREAK


Audio Editing Workshop

Audacity shortcuts to know:

Play/pause: Space bar
Split track: Command I
Zoom in: Command 1
Zoom out: Command 3

In the tool bar, this is the selection tool that allows you to click and highlight and delete sections of track or select a spot where you want to split it:

And this is the tool that allows you to move sections of track:


And this is the one that lets you adjust the volume, basically the same way the pen tool works in Premiere for anyone who may be familiar with that program:

You’ll need to export the finished sound file before you can upload it anywhere.

In Audacity, it’s File –> Export Audio –> select “WAV” from dropdown menu and give the file a name and location, then hit “Save” and “OK.”

I recommend uploading to Soundcloud rather than hosting it on the blog. It’s free to create an account. Please post the link on the class blog by the end of the day.

Example Script

Host intro: With CUNY schools transitioning to online learning this week amid the coronavirus outbreak, professors across New York City are getting creative. Emily Johnson spoke to one CUNY adjunct about what it’s like trying to teach during a pandemic.

AMBI: Nat sounds of tea kettle boiling (FADE DOWN AS TRACK BEGINS)

TRACK: I’m here with Anna Ficek in her Brooklyn apartment, watching her make tea while she works from home. She’s a PhD student at the CUNY Grad Center and when she’s not working on her dissertation she teaches art history at Baruch College and Borough of Manhattan Community College, or BMCC.

ACT: ANNA: When I found out that everything was getting shut down and especially CUNY I felt extremely sad. Because CUNY is such a big part of my lie, such a great community that it was hard to feel that kind of dissipating.

TRACK: She says teaching from home has been a real challenge because of the way she runs her classes.

ACT: ANNA: It’s been very difficult to adapt to teaching remotely just because I really value the discussion I have with my students.

TRACK: Still, she’s trying to see this as an opportunity.

ACT: ANNA: What I’m hoping to get out of this is more time to really focus on what’s important both in terms of teaching and my own dissertation and my own research and trying to figure out creative problem solving ways to deal with these new issues that are going to come around like libraries being closed and inaccessibility to archives and how myself as an academic and as a researcher can get around that. So challenges, but also good challenges!

TRACK: CUNY schools will continue with distance learning for at least the remainder of the spring semester. For Baruch College, I’m Emily Johnson.


Upcoming due dates:

Monday, August 3: Radio scripts due. Individual script edit meetings and video pitches due. Sign up for a time slot here.

Wednesday, August 5: Radio stories due.


Class Agenda: Monday, July 27

Pitch Workshop 

We’ll discuss your pitches for your radio stories.


Practice Exercise

Find a family member/friend/partner to interview or pair up with a classmate. Take turns interviewing each other (over the phone, if necessary, and share your recordings with each other) about something they’ve done this summer (whether their job, how they’ve adapted to life in the pandemic, maybe they bought a bike so they can get around the city more safely, etc). Remember to ask open-ended questions. Interviews should be 3-5  minutes long. Record some natural sound if there is any.

When you’re finished, save your sound files to the computer (and send them to your partner if you did the interview remotely). Transcribe your interview. Pick out your top three sound bites and write a short script following this format:

Host intro: (Here, the host will give background info  and introduce you, the reporter. You can have a friend record this part if you like.)

AMBI1: (This is where your scene-setting natural sound will go, and it will fade down under your track.)

AMBI2: (As the nats fade down, this is where your room tone will come in. You’ll keep it at a normal volume behind all of your narration.)

TRACK: (Describe where you are and introduce the person you’re interviewing.)

ACT: (Sound bite #1.)

TRACK: (More background info, set up next sound bite.)

ACT: (Sound bite #2.)

TRACK: (More background info, set up next sound bite.)

ACT: (Sound bite #3.)

TRACK: (Use your narration to wrap things up, often by looking towards the future in some way, and then sign off. “For Baruch College, this is __ ___ in New York City/your borough.”)

Recording Narration

  • Record your narration in an improvised at-home “studio.” Aim to record in a space that absorbs sound: a room with carpeting, curtains, bedding, etc. Some tried-and-true methods that radio journalists use in a pinch is to go in their closet or simply to throw a blanket over their head. Take a look at the way some WNYC journalists are setting themselves up at home for inspiration: https://twitter.com/WNYC/status/1239896211903086592
Radio/Podcast Reporting Social Distancing Guidelines
  • Conduct interviews over the phone and record them.​
  • If your subject is willing and has access to a landline or a borrowed phone, ask them to record a “tape sync” for you by recording their end of the call with their Voice Memos app (or equivalent) and then sending you the file along with at least 90 seconds of room tone. Make sure they know where the phone mic is located (on iPhones, it’s on the bottom of the phone.) Make sure you record the call from your end, too, as a backup.
  • To record a call from your end, there are a few options. 1) Google Voice is free to use: create a number, route it to your phone and press “4” during any call to start recording. 2) TapeACall is also a great app which lots of professionals use, but it’s not free. 3) Put the phone on speaker and record it with your audio recorder or a borrowed phone.
  • Download Audio Hijack, which allows you to record the system audio from your computer for up to ten minutes. This will allow you to grab audio from Cuomo/de Blasio press conferences, YouTube or Instagram videos, etc., depending on what you’re covering.
  • Record natural sound only if it’s something you can do at home or by going for a solitary walk or bike ride outside and from a distance of greater than six feet. You can also use clips of audio from online videos as natural sound if relevant to the story (like the Iceland screaming story we listened to).

For Wednesday:

Post your script to the class blog *and record your narration* by class time on Wednesday. We will use your script and sound from this exercise to edit together a practice radio story that day in Audacity.


Class Agenda: Wednesday, July 22

Discussion

Photo essays: screening and feedback as a class.

Intro to Radio Reporting

Photo by Youth Radio

For your radio stories, you’ll be creating something called a wrap: a scripted feature with narration, natural sounds, and sound bites all woven together.

Sample wrap.

Sample radio script.

Here are some basics you’ll want to keep in mind as you set out to collect sound:

Choose your environment wisely. Be aware of your surroundings. If you interview someone under a subway track, your recording will be impossible to understand. Pick a relatively quiet space. A little background noise is fine and adds atmosphere – except for music. Music makes editing difficult, so avoid it if possible.

Check your batteries beforehand. It’s a real bummer when you start interviewing someone and realize you only have ten minutes of life left on your recorder or phone. Bring backups!

Cell phones off. Yours and theirs. If you’re using your phone to record, make sure it’s set to silent.

Don’t forget your nats. Natural sound is a crucial element of any audio piece. Think about what sounds will most effectively place your listener in the scene. Footsteps, dishes clinking, phones ringing. Don’t be afraid to get in there and get close. Music is fine to use as a nat sound, but not as background to an interview. It will mess up your ability to edit.

Don’t forget your ambi. “Ambi” refers to ambient sound, also known as room tone. Basically, this is the background noise from wherever you happen to conduct your interviews. Even if you record in a very quiet place, nothing still usually sounds like something because of how the acoustics vary in different rooms. Before or after every interview, always record 90 seconds to two minutes of ambi. This will go under your narration to make the story feel seamless.

Ask open-ended questions. Yes or no questions won’t give you good long responses filled with usable quotes.

Get close, but not too close. Putting a mic right up against someone’s mouth can result in popping and crackling sounds on the recording. Make sure to test your equipment so you know roughly where to hold your recorder for optimal sound quality.

Ask your question, then shut up. Active listening is a fantastic skill for a journalist to have, but if you keep murmuring “Uh-huh,” “Yeah,” and “Sure,” while they’re answering your questions, you won’t be able to use the material. Stick with smiling and nodding.

Using an audio recorder. Always monitor your sound with headphones while recording, if possible. Hold the mic 1-2 feet from the interviewee’s mouth. Never let the person you’re interviewing hold it. Use the handle to reduce handling noise.

If recording an interview remotely, try to do a tape sync. A tape sync means recording both ends of a phone interview in person and then editing them together. This will allow the sound quality for both voices to be high-quality and clear. Typically, radio hosts hire freelancers who live in the same city as their interviewee to go out and record the tape syncs, but in the pandemic it’s become more common to ask the interviewee to do it themselves and then send it to you.

A couple more radio stories:

Example of a clever host intro:

Need to release stress? Scream into Iceland’s abyss.

Great example of a local NYC story:

At this Brooklyn restaurant, you can get Korean food with a side of Russian history

A story reported by a Baruch multimedia student after the lockdown started last semester:

Online Challenges for the Special Needs Child

Guidelines for radio pitches

Assignment #2 will be a 3 or 4-minute news radio feature (a “wrap”). A wrap is a scripted radio piece that weaves together natural sounds, interview clips (known as “actualities”), and reporter narration to tell a story.

These are the components you are required to submit for the final draft:

  1. A good headline/title.
  2. Your final 3-4  minute edited audio file, posted to Soundcloud and embedded on the blog or on Exposure.
  3. At least one photo.
  4. The final draft of your script.

Monday, July 27: Pitches due for radio story.

August 3: Radio scripts due.

August 5: Radio stories due.

Class Agenda: Wednesday, July 15

Pitch Workshop

Discuss, brainstorm, workshop story ideas for photo essays.

Photo Scavenger Hunt:

We’ll look at photos together from your in-class assignment. You’ll also use these for some practice photo editing and using Exposure.

Once you’ve finished, you can send what you think are your best 5 images to me using wetransfer.com.

Reminder:

On Monday, we will NOT be holding a formal class on Zoom; instead, that day will be devoted to reporting/production/editing. I will, however, make myself available all day on Monday for anyone who wants feedback and one-on-one coaching/editor feedback. I strongly encourage you all to try and get most of your photos and reporting done over the weekend so you can take advantage of this. If you want to schedule a Zoom session that day, please shoot me an email or text sometime between now and then.

Photo essays will be due by class time next Wednesday, July 22.

Multimedia Reporting, Summer 2020

Hello, JRN 3510 students! This class blog is where you’ll pitch stories, submit drafts, publish your edited stories, and workshop each other’s projects and ideas. I will also post my lectures here so that you can refer back to them.

Welcome and introductions.

I essentially run my classes like a small newsroom. So for the duration of this course, you will be the reporters and I will be your editor. If you have any questions or run into any problems on your assignments and need a quick response, the best way to reach me is just to text me; my number is in the syllabus. For anything less time-sensitive, email is fine.

Review the syllabus:

Multimedia-Reporting-Syllabus-Fall-2020

What does “multimedia” journalism mean and how is it changing?

Traditional forms like writing, radio and broadcast have moved online and can complement each other when it comes to telling a complete, dynamic story.

Snow Fall was revolutionary in 2012; now this type of interactive multimedia-heavy layout is fairly common. More recently the NYT Magazine used this kind of scrolling presentation to great effect with The 1619 Project.

The old forms of traditional media still exist, but they have adapted to new methods of delivery and consumption.

Radio stories on the air –> downloadable/streamable podcasts and web versions of stories with photos

TV news –> online video (compositional framing changes, video length changes, formatting optimized for mobile)—and the bar for web video is getting higher and higher

Newspaper-style photography and landscape orientation –> Instagram and the rise of medium format (square) and portrait orientation (contains more information)

The availability of online multimedia content has also made aggregation easy (tweet roundups, etc.) and helped to create a click-driven economy. Twitter and other social platforms have changed the way news breaks.

Intro to Photojournalism

Here are some basic rules and guidelines of photo composition to keep in mind as you start developing your eye:

1. The Rule of Thirds.

If you pay attention to only one element of composition, the rule of thirds should be it. If you start shooting with this “rule” in mind, your pictures will begin to look a lot better immediately.

The general idea is to imagine breaking an image down into thirds, both horizontally and vertically. If you place the main points of interest in your photo where the lines intersect, or along the lines themselves, your image will be far more visually interesting than if you just put the subject smack in the middle. Studies have shown that composing photos this way draws the human eye far more effectively.

Screen shot 2013-06-24 at 9.52.17 AM
Screen Shot: Google Images
12711073_10100277373528059_626850534320898319_o
Credit: Emily H. Johnson
12291934_10100247622813729_2801330229567180291_o
Credit: Emily H. Johnson

2. Use color.

Black and white photography is a beautiful art form, but in photojournalism, most of the time you’ll be shooting in color. It helps to know what combinations of color to look for if you want your images to really pop.

Image result for afghan girl
Credit: Steve McCurry

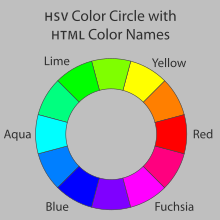
You probably recognize this photo. Known as Afghan Girl, it is one of National Geographic’s most iconic images and was taken by color master Steve McCurry. One of the reasons this relatively simple picture is so stunning and so well-known is the colors: red and green, which fall on opposite sides of the color wheel.

Credit: Wikipedia

Opposite colors, paired together, can make each other look more vibrant. Notice how the green of the girl’s eyes is picked up by the wall behind her and set off by the rusty red of her scarf.

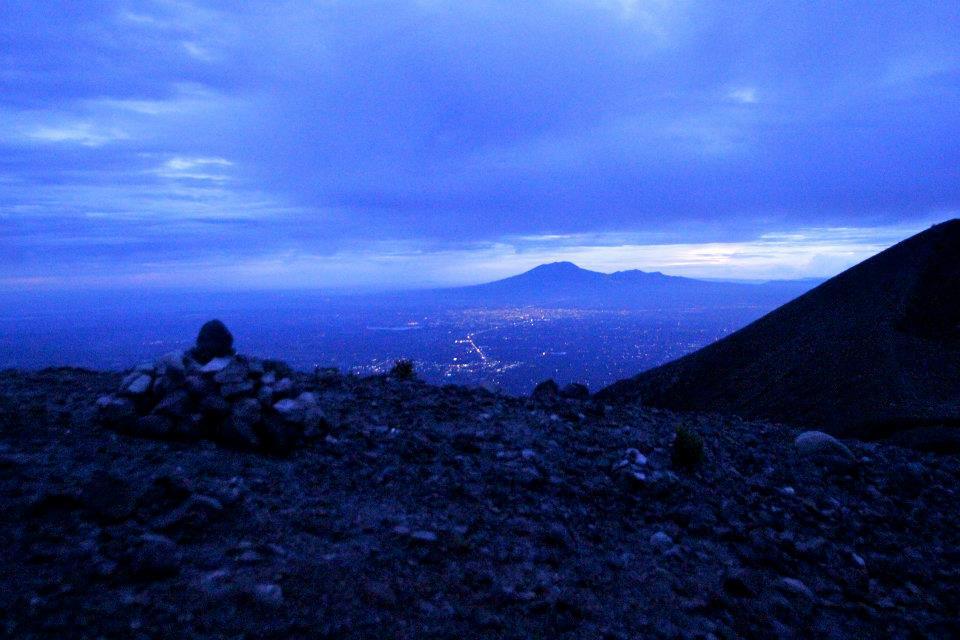
Images with variations on the same color, known as monochromatic images, can also be quite striking:

Credit: Emily H. Johnson

3. Capture the decisive moment.

“The decisive moment” is a term that was coined by renowned photographer Henri Cartier-Bresson. It refers to that fleeting instant that photographers love to capture: When someone leans in for a kiss, when a soccer player connects with with the ball, or when a protester throws a rock. If you aren’t ready with your finger on the shutter, you’ll miss the moment. If Bresson had taken this photo a split second earlier or later, it would have been a much more ordinary photo of a man splashing through a puddle. These moments don’t need to be that dramatic; for your assignments, it may be as simple as capturing the moment when the food truck owner you’re profiling flips some meat on the grill or hands the food to her customer. Action shots vs static shots tell more of a story.

Credit: Henri Cartier-Bresson

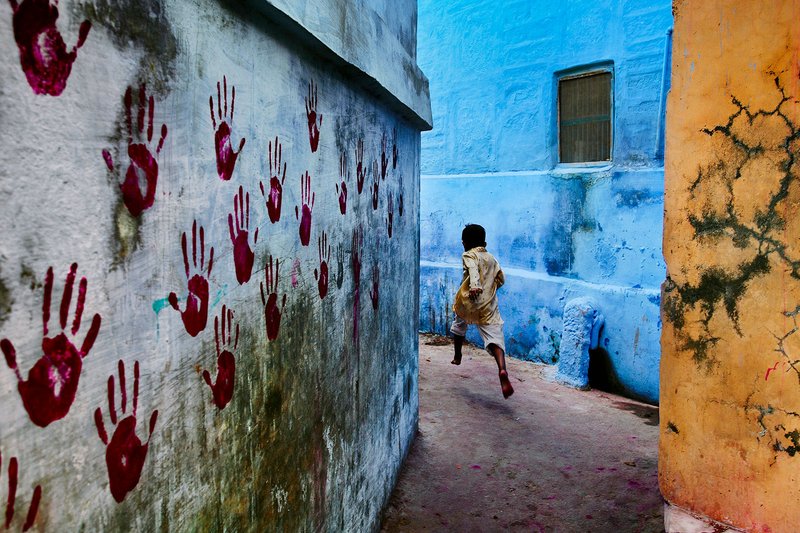
Another decisive moment, this one also by “Afghan Girl” photographer Steve McCurry.

Image result for steve mccurry kid running hand prints
Credit: Steve McCurry
Credit: Emily H. Johnson

View this post on Instagram

Good morning, Taipei. #layover #taipei #taiwan

A post shared by Emily H. Johnson (@emilyjreports) on

4. Leading lines.

Leading lines are lines that move the eye from one part of the image to another part, or sometimes out of the image. They add a sense of drama and perspective, so it’s always good to be on the lookout for roads, bridges, fences, shorelines and the like.

Credit: Emily H. Johnson
Image result for leading linesImage result for leading lines
Screen Shot: Google Images

5. Symmetry and patterns.

Symmetry and patterns exist everywhere, both in nature and man-made sights. Looking for repetitions and symmetries, while staying alert to things that then break those very patterns (especially on the thirds!) is a sure way to make an arresting image.

Credit: Emily H. Johnson
Credit: Emily H. JohnsonImage result for symmetry and patterns photography
Image result for symmetry and patterns photography
A moment of political passion breaks out amongst tens of thousands who gathered for a pre-election protest in Tahrir Square in Cairo, Egypt. Credit: Amanda Mustard

6. Layers.

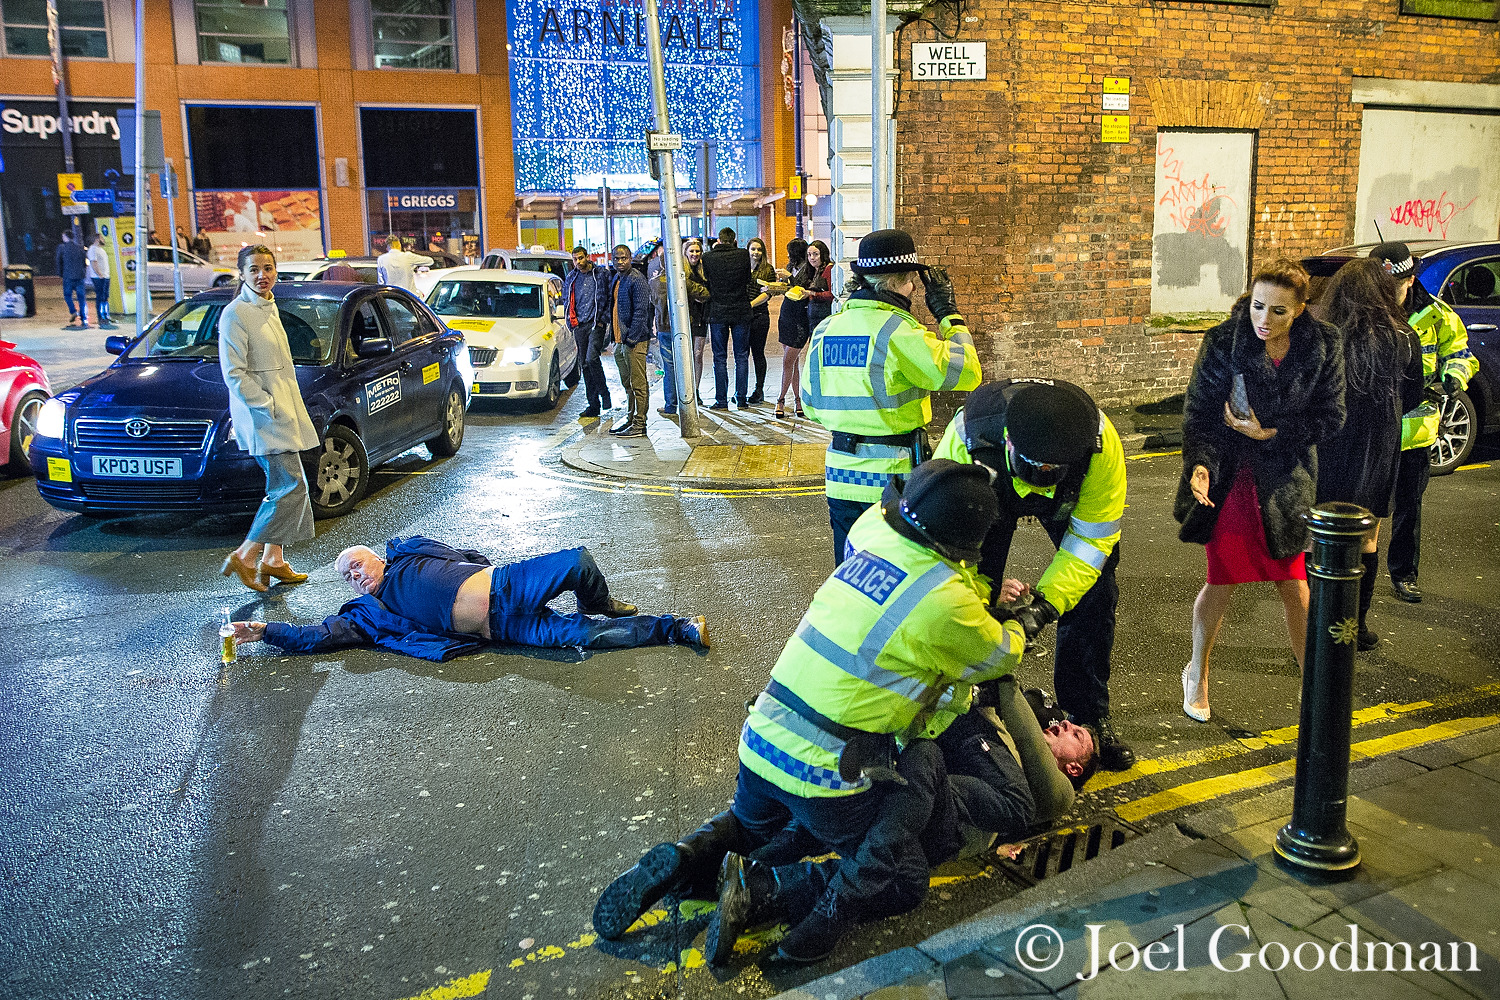
Another great way to make sure your images are visually interesting is to keep an eye out for what’s happening up close, in the middle distance, and far away. Think in layers. If you can frame your shots so that interesting things are happening in the background as well as at your focal point five feet away, you’re onto something.

Image result for joel goodman manchester new years eve
Credit: Joel Goodman

Layers will be one of your greatest tools as a photojournalist, because layers add context. They tell a story.

Credit: Emily H. Johnson

This is a famous photograph by South African photojournalist Kevin Carter. He won a Pulitzer Prize for this image, which showed the effects of the 1993 famine in Sudan.

Credit: Kevin Carter

“Photojournalism” means you’re telling a story, not just taking a picture.

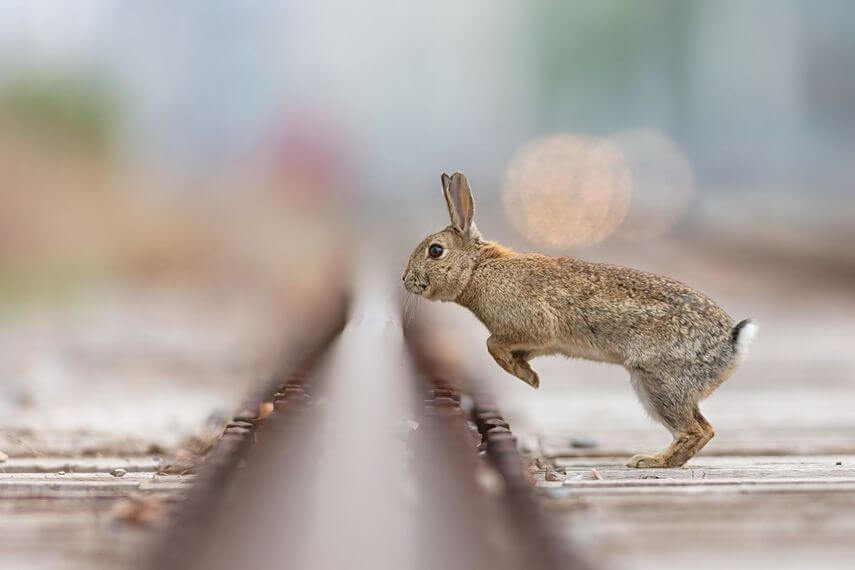
Layers are also a great chance to play around with something called depth of field. This refers to the difference in focus between things that are in the foreground vs. the background—if there isn’t much difference, like in the Kevin Carter photo above, then you’re using greater depth of field. When that difference is dramatic, like when your phone is in Portrait Mode, it’s called shallow depth of field. Shallow depth of field also gives you something called bokeh, which turns background lights into warm globes.

“City Hurdling” by Henrik Spranz

Depth of field is affected by a few things: the focal length of your lens, your distance from the thing in focus, and aperture. We’ll talk more about that when we get into camera settings.

7. Light.

Light impacts everything we do as photographers. How much are we working with? Is it natural or artificial? What is the temperature of the light? What direction is it coming from? Is it harsh or diffuse? What time of day is it? Are you using a flash? Many photojournalists prefer to shoot with natural light as much as possible. Portrait photographers and fashion/fine art photographers often use studio lighting to create interesting lighting environments.

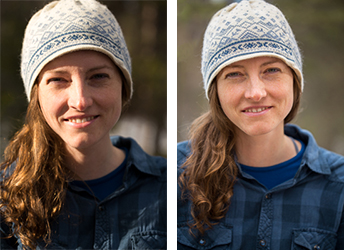
Different kinds of light will affect how different people look in photographs depending on their skin tone.


A Look at How HBO’s ‘Insecure’ Lights Black Actors so Well

8. Get close. Then, get even closer.

Photographer Robert Capa famously said, “If your pictures aren’t good enough, you’re not close enough.” Proximity with your subjects makes for more powerful and intimate photos. Don’t be afraid to get right in someone’s face with your camera. It may feel intrusive and strange at first, but a huge part of being a reporter is engaging with people and making them feel comfortable.

What’s the process like? How do you go about shoving a camera in someone’s face?

For analysis: The Week in Pictures

Ten-Minute Break

Introduction to DSLR Photography

Unfortunately, with this semester being taught remotely, I won’t be able to sign out cameras for you to practice photography with. If you happen to have access to a DSLR camera, great! You’re welcome to use that for your assignments. If not, no worries; your photo assignments can all be done on your phone for this course.

Regardless, we’re still going to go over camera settings and a bit of theory so you understand how it all works.

The first time you pick up a DSLR camera, the sheer number of settings and dials can be a little overwhelming. You may be tempted to stick with Auto when you start out — and that’s totally fine while you’re getting the hang of it.

But to make sure you are taking the best possible pictures, it helps to have control over a few key settings: ISOaperture, and shutter speed, which collectively make up the three pillars of photography. Tweaking these settings will allow you to take different types of pictures, and all of them essentially come down to one thing: light.

The Bucket

It may be helpful to keep this analogy in mind.

Imagine you are using a garden hose to fill a bucket to the top. Next, imagine that our end goal — a bucket filled exactly to the brim, but without spilling — equals a perfectly exposed photograph .

A few things control how much water goes in the bucket and how long it takes to reach the brim: the width of the hose, the water pressure, and how long you let the water run. You can achieve your goal using endless combinations of these factors. A very narrow pipe running at a steady pressure for a long time will fill your bucket as surely as a very wide pipe running for only a few moments.

A camera works the same way to let in the correct amount of light. Imagine that the width of the hose is the aperture, the amount of time you run the tap is the shutter speed, and the water pressure is the ISO.

ISO

Basically, ISO refers to how sensitive your camera’s sensor is to light. The lower the number, the less sensitive it is and vice versa. The ISO range in the DSLR cameras we’ll be using usually goes from 100 to 6400, doubling as it goes (100 to 200 to 400 and so on until it gets up to 3200 and 6400).

It follows, then, that you will need to adjust the ISO for the available lighting conditions.

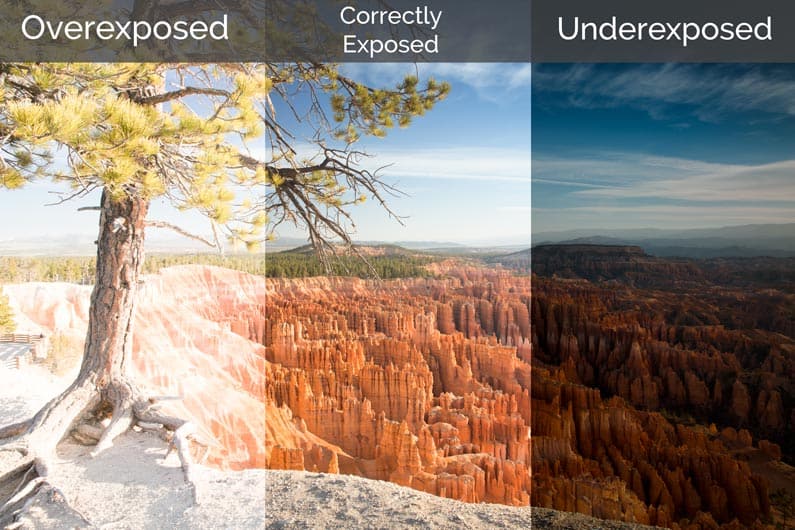
In broad daylight, there is plenty of light to work with, so a low ISO will be all you need. If you let in too much light, the image will be overexposed.

Image result for overexposed photo
Credit: Dan Carr

If you are shooting indoors in artificial light, you will need a much higher ISO — but be aware that you sacrifice image quality as you get up to the highest ISO settings, where you will start to notice a grainy quality. So before you reach for the dial to crank the ISO up to 3200, try letting a bit more light into the camera using a wider (lower) aperture or slower shutter speed.

Credit: here

Shutter Speed

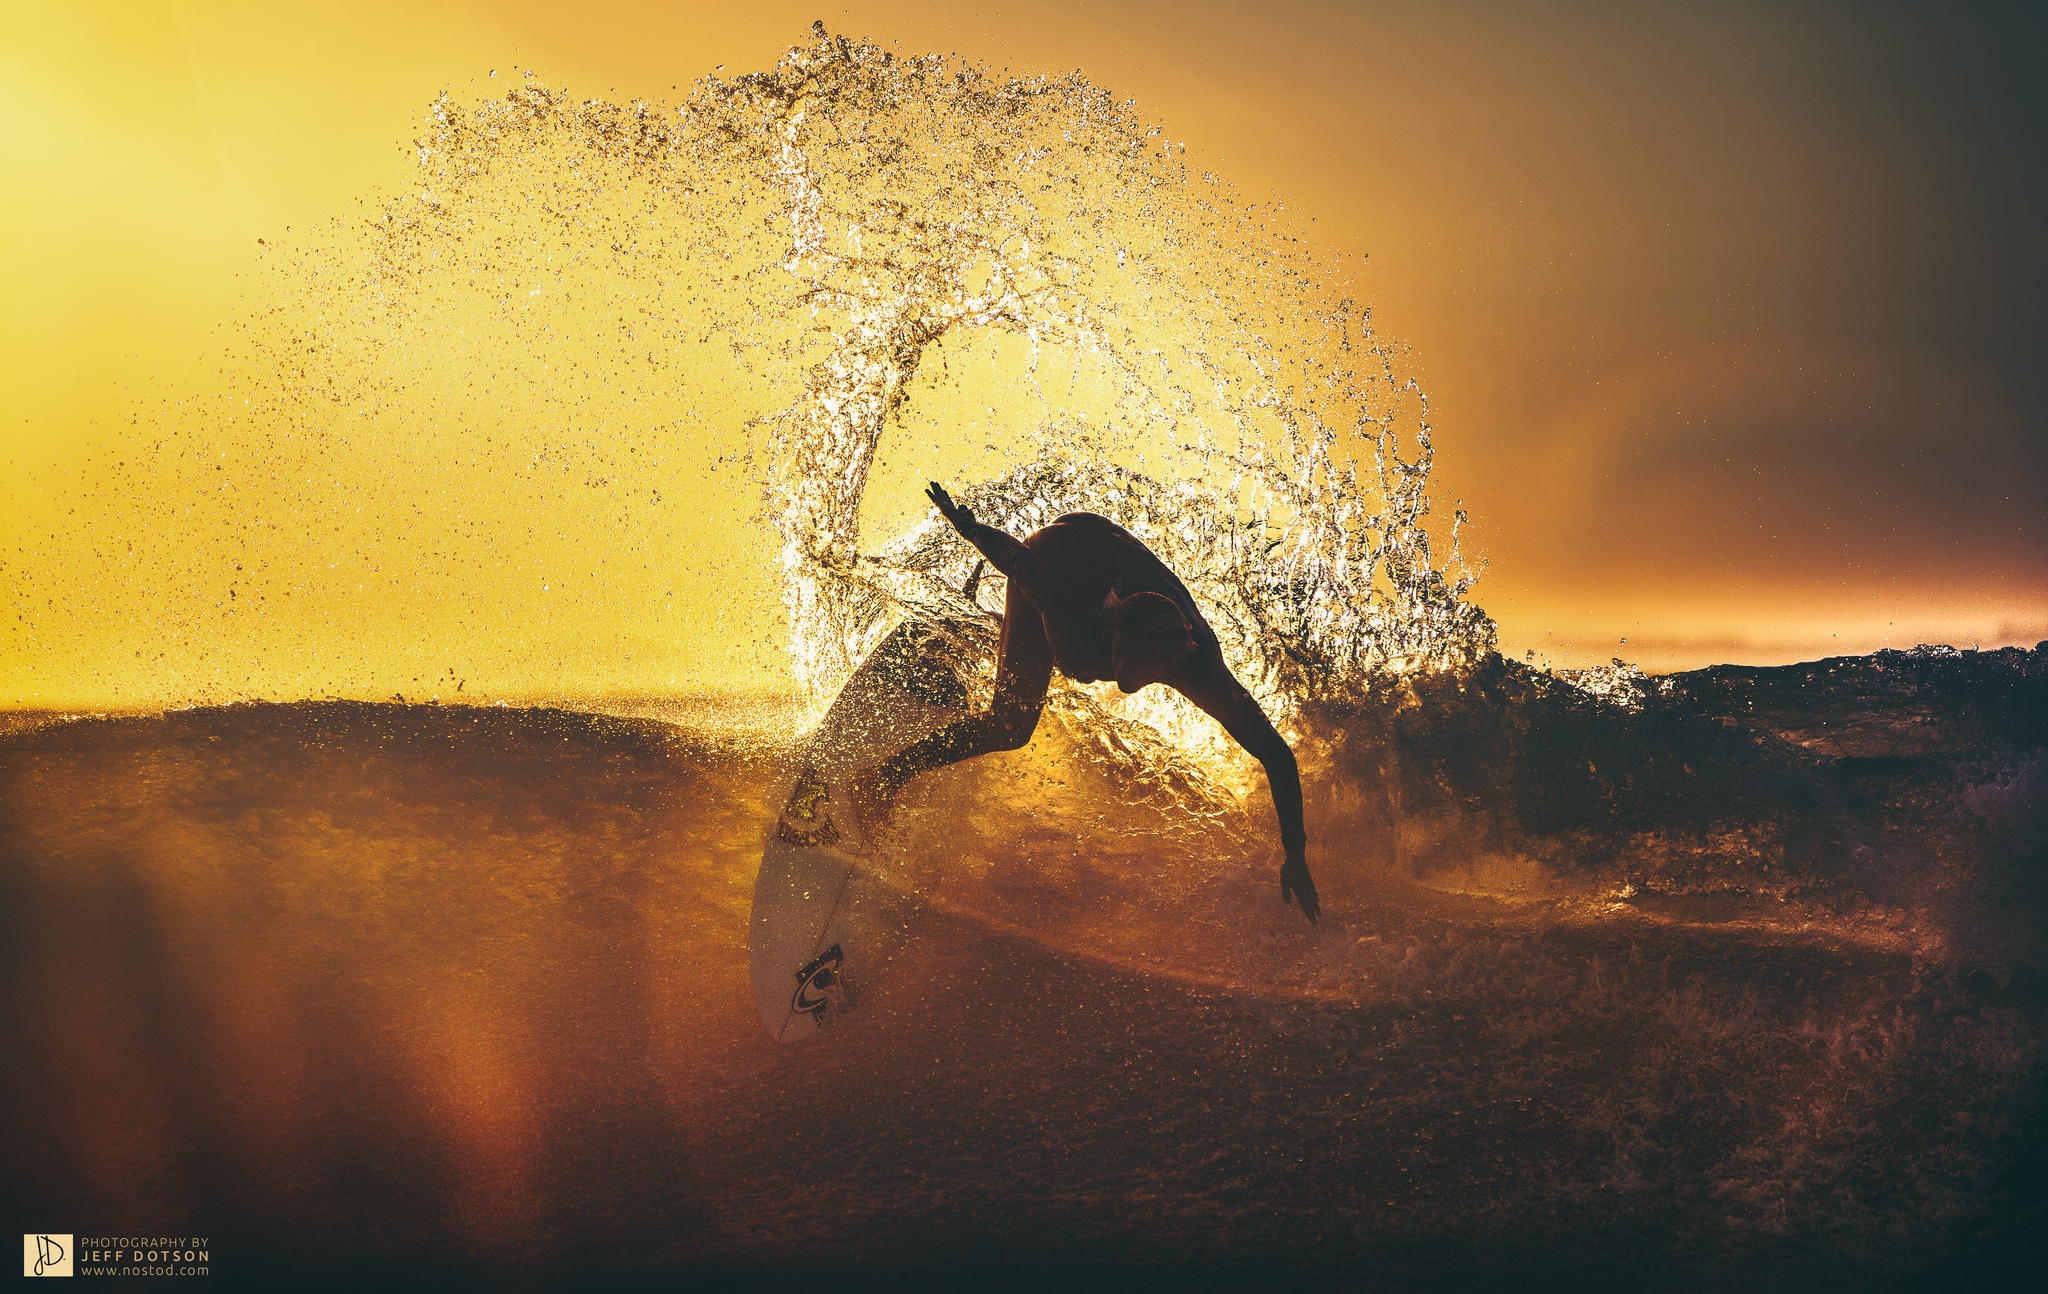
Shutter speed is probably the simplest setting to understand. It refers to how long the camera’s shutter stays open. The longer the shutter is open, the more light is able to come in, and vice versa.

Shutter speed typically ranges from about 1/1000th of a second (very fast) to a few seconds (very slow). Slow shutter speed allow for a longer exposure time, which allows the camera to capture more movement. This can be a good thing or a bad thing, depending on the image you want to make.

A faster shutter speed would have captured the aqua-colored glove crisply. Using a slower shutter speed can create a sense of motion. Credit: Lindsay Armstrong

A long exposure can allow you to capture objects in motion in an artistically blurred fashion — or it can capture unwanted camera shake if you’re shooting without a tripod.

Slow Shutter Speed

Credit: Shaw Academy
Image result for fast shutter speed surfing
Credit: Jeff Dotson

Sports photographers trying to capture crisp images, for example, are likely to rely on a fast shutter speed because their subjects are moving so quickly.

Aperture

Aperture refers to the opening in the lens. The wider it is, the more light it lets in. Somewhat confusingly, smaller numbers equate to wider aperture. Aperture is measured in “f-stops” and lenses can have different ranges. The wide-angle lenses that come with the journalism department’s DSLR cameras typically range from about f/3.5 (the widest) to f/22 (letting in the least amount of light).

Image result for shallow depth of field vs deep

IMG_5185-Edit_BLOG
Credit: Cole’s Classroom

A low aperture, in addition to helping you shoot in low-light conditions, allows you to capture a shallow depth of field. This refers to the effect where an object in the foreground is in focus but the background is blurred (or vice versa).

This also allows you to play with the bokeh effect, as we discussed a little earlier.

A high aperture, on the other hand, allows to retain detail at every layer of the image, which can be vital in terms of storytelling. If there are protest signs in the background, for instance, and your camera lens is focused on a police officer in the foreground, a shallow depth of field means we may not be able to tell what the signs say. In such a situation, you might want a flatter image, with a deeper depth of field.

Image result for deep depth of field photojournalism

Image result for protests photojournalism depth of field
Credit: Sean Cayton

Aperture Priority vs. Shutter Priority vs. Manual

As soon as you’re ready to leave the comfort of Auto behind, the next logical step is to experiment with Aperture Priority and Shutter Priority shooting modes (“Av” and “Tv” on your DSLR dial). These settings operate exactly the way their names suggest. You decide whether aperture or shutter speed is more important to the image you want to make and the camera will automatically adjust the other one for the correct exposure.

So if you’re shooting a soccer game, for instance, shutter speed is probably more important. There will be a lot of movement and you’ll want to capture the action crisply. But if you’re taking a portrait and you want to blur the background to allow your subject’s face to stand out, aperture priority is the obvious choice.

In both of these shooting modes, you still have to control for ISO, but they make your job a little bit easier than if you were to jump straight from Auto to Manual. Going back to our analogy, you only have to worry about two out of the three elements that fill the bucket. But once you’ve mastered Aperture Priority and Shutter Priority, you’ll be ready to take the final leap to Manual.

Screen shot 2014-06-09 at 5.23.56 PM

Screenshot. Credit: CameraSim

The best way to learn all of this is by doing it, so if you have a camera, practice with the different settings. If you don’t, a good way to get some practice juggling all the settings is by using CameraSim, an online DSLR simulator. It allows you to play with camera settings, lighting conditions, distance from subject, and a few other factors that go into taking a picture, and to check your best guesses against the resulting image.

Next: How to construct a photo essay

A photo essay is a thoroughly reported story, told in well-composed and curated images and captions. Ideally, there should be a mix of images so that the eye is always looking as something new as the viewer clicks or scrolls through: close-up shots, wide shots, portraits, colorful shots, bright shots, dark shots, action shots, etc. Intimacy is a powerful tool in these sorts of projects.

Somali Life in Minnesota

NYT Lens Blog

https://weifadifferently.exposure.co/we-ifa-differently?source=share-weifadifferently

https://reemadoleh.exposure.co/gentrification-in-brooklyn

https://yasminemohamed.exposure.co/tensions-boil-over-in-kashmir

Assignment

Pitch a photo essay. This could be a character-driven human interest story, or an event that is very visual in nature, or it could provide a local angle on an ongoing story. If stuck, ask yourself: What events are coming up that would make for cool photos? What are the big international, national or regional issues that have been making news of late? Obviously, we’re a bit limited at the moment because of the pandemic, so please make sure your ideas involve stories you can photograph safely.

Examples: Follow an essential worker like a delivery driver for a day. Photograph a barber who has set up a chair on the sidewalk for outdoor haircuts. Document a band that has started playing a regular, informal gig every night in the park. Cover a protest or vigil.

Social Distancing Reporting Guidelines

A major caveat: While intimacy generally makes for more powerful images, be safe and use your judgment. Some of us will have access to stories and moments that others might not, whether due to age or gender or race, and some of us might be at risk attempting to cover stories that others would have no issues with.

Pitches will be due next class, on Wednesday, July 15.

Post your pitches here on the class blog. Give a couple of paragraphs telling us who/what your photo essays will be covering, and why it is interesting or timely or relevant. Confirm that you actually have access to the story you want to do. And finally, tell us what kind of visuals you anticipate. Do yourself a favor and pitch a story that is visually interesting rather than trying to force an interesting but not-super-visual story to work for this assignment.

The photo essay will be due a week from Wednesday, on July 22.

Time-dependent: Photo Scavenger Hunt.

With the time you have left, go out and look for at least 10 strongly-composed images that capture some of the following elements of composition (some of these will inevitably contain multiple elements, and that’s fine—ideal, even). Please have them on your computers and ready to edit with by next class.

Contrasting colors
Monochromatic colors
Symmetry
Pattern
Rule of thirds
Close-up detail shot
Shallow depth of field
Portrait
Dramatic/beautiful/interesting use of light
Slow shutter speed
Internal framing
Movement
Decisive moment
Layers telling a story
Unusual perspective