6 Week (actually an expedited 2 week) Plan for World Domination:
Focus: MMOM (make my own mug)

Through the process of making my own clay, firing it in a kiln (also to be made) and glazing it myself, this should be an interesting project! Lets Go!!
-
Saturday November 30th: Research what a wonderful world we can make things ourselves from what we are given, would you look at that! CLAY RESEARCH
-
Sunday December 1st: Finding the right spot (in the yard for picking my clay- lets hope mom and dad don’t get annoyed that i’m digging up the lawn)
-
Tuesday December 3rd: check in on the clay making process and note findings of progress and how the clay has settled as opposed to research. Does temperature have an effect on the process? Probably.
-
Friday December 6th: By this time, the clay should be ready if not wait for Saturday
-
Saturday December 7th: WORK DAY- Lets see what we can create/ make from the things we have been given. Pictures of my masterpiece to be created.
-
Sunday December 8th: KILN RESEARCH
-
Tuesday December 10th: Gathering materials for the creation of our kiln (ask for help this can be a potentially dangerous process from what I have read on the internet) I may just go with a simple cinder block and wood burning method. TBD.
SUNDAY DECEMBER 1st: Clay Making Process
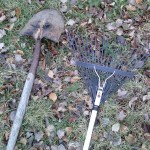
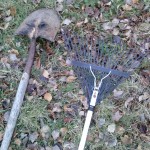
Step 1- Gathering Materials: I looked up several clay making processes and got a sense of the best way to go about making my clay. Without some of the materials used in the tutorials I watched, I scoured my house for a makeshift sifter (my mom would not let me use our strainer for dirt), and a few buckets to hold my earthen creation. In addition to these materials, I used a large shovel, a rake and a gardening shovel to clear and dig a whole when I found the right spot.

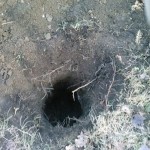
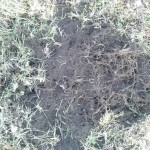
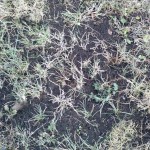
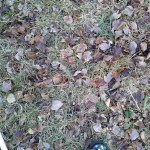
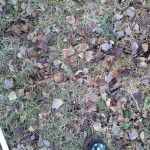
Step 2- Finding the Right Spot: According to …. clay deposits are found below the topsoil and in areas that become over-saturated when it rains. Following this guidance I used a lower lying piece of my yard to dig. I first cleared the area, turned up the soil and then began to dig a whole approximately 1 1/2 feet down to where i could see the color and texture change in the soil.
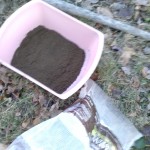

Step 3- Processing the Soil: Using my gardening shovel and makeshift sifter- an old mesh onion bag- I began to dig up the crumbly reddish brown soil and sift it through the bag into my pink container. After 4 rounds of sifting and breaking up soil clumps by hand, I had enough soil to move onto the next step of processing.

Step 4- Watering the Soil: The sifted soil was then transfered to the clear bucket, filling it around 1/3 of the way up. I then added water to fill the bucket to the brim and stirred the mixture so that it was evenly mixed. The mixture then settled so that the sand from the mud mixture was on the bottom and the clay water was in a layer above the sand. I poured the clay water off from the bucket into the pink container and emptied the remaining sand back onto the ground. After washing out the clear bucket I poured the clay water back into it so that I could see if there was any more settling, ensuring that all of the sand was out of the mixture.
Step 5- Settling: After waiting a couple of hours, I was disappointed to see that the clay had barely settled a few millimeters from the surface. I referred back to my online references and saw that adding a bit of dishwashing liquid to the clay water would speed up settling. The finished product as of now is a bucket with clay water settling in my basement. Hopefully in a couple of days there will be more progress with pictures to come!
TUESDAY DECEMBER 3rd: Check Settling Process
On Tuesday, I was eager to check the amount of settling in my container. I had actually checked it several times the same night of my dig but figured I would have to wait longer than a few hours to see any real change. By Tuesday night I couldn’t wait to see what I had thought would be a container half full of clay and clear water on top but was disappointed to see that there had been almost no change from the nights before. I then remembered from one of my internet sources that adding dishwashing liquid to the mixture would quicken settling. I then added about a quarter cup of dishwashing liquid (explaining the bubbles in the mixture) stirred an hoped that by the next check in, there would be a visible change.
FRIDAY DECEMBER 6th: Check Settling Process (Part 2)
By Friday, I was really excited to see my creation. However, there would be no celebration. Checking in on the clay water 3 days later, I was disappointed yet again to find that there had only been minor settling around half a centimeter from the surface of the water. Rather than adding more soap to the solution I went back to my references and did a little research on the settlement of clay in bodies of water. I found that clay particles are so small that the excess negative charge around them causes the particles to repel each other in freshwater. Therefore, to neutralize the clay mixture, there was a simple solution- adding salt! It was a last ditch effort to salvage my project. But, it was backed by science that I could understand without going into ecology so I was confident in its potential results. I added around a quarter cup of salt to the container and left the foggy water to settle once again.
SATURDAY DECEMBER 7th: Work Day….?
This intended “work day” was pushed back due to the unforeseen hitches in the clay extraction process.
SUNDAY DECEMBER 8th: Check Settling Process (Part 3 *Fingers Crossed*)
I gave the clay water a few days to settle to insure that there would be some progress and was pleasantly surprised to see a drastic change in the clarity of the water. It wasn’t completely clear, but it was a sign of hope for my project. With this new found hope I let the mixture settle another day so that I would be able to extract as much clay as possible.
FRIDAY DECEMBER 13th: Clay Extraction & Drying
At this point my project was looking up, I had gotten through some major bumps in the road and the learning curve was huge in my case. I was able to salvage the essence of it however and finally extract the clay portion of my mixture from the water. I began by pouring off as much of the semi- clear water as I could and then began scrapping what was left (literally the bottom of the container) into an old t-shirt to drain. I was excited and hopeful when I felt the consistency of the muddy mixture but also saddened by the small amount of clay I was able to obtain. I also knew there would be even less clay once it dried out to a workable consistency. Nevertheless, I was able to come away with something out of the larger mass of raw material I started with. so, here is the big reveal:
SATURDAY DECEMBER 14th: KILN Research
When I started my exploration into the pottery making world there were many different options I found when it came to firing the finished product.