


Introduction to DSLR Photography
The first time you pick up a DSLR camera, the sheer number of settings and dials can be a little overwhelming. You may be tempted to stick with Auto when you start out — and that’s totally fine while you’re getting the hang of it.
But to make sure you are taking the best possible pictures, it helps to have control over a few key settings: ISO, aperture, and shutter speed, which collectively make up the three pillars of photography. Tweaking these settings will allow you to take different types of pictures, and all of them essentially come down to one thing: light.
The Bucket
It may be helpful to keep this analogy in mind.
Imagine you are using a garden hose to fill a bucket to the top. Next, imagine that our end goal — a bucket filled exactly to the brim, but without spilling — equals a perfectly exposed photograph .
A few things control how much water goes in the bucket and how long it takes to reach the brim: the width of the hose, the water pressure, and how long you let the water run. You can achieve your goal using endless combinations of these factors. A very narrow pipe running at a steady pressure for a long time will fill your bucket as surely as a very wide pipe running for only a few moments.
A camera works the same way to let in the correct amount of light. Imagine that the width of the hose is the aperture, the amount of time you run the tap is the shutter speed, and the water pressure is the ISO.
ISO
Basically, ISO refers to how sensitive your camera’s sensor is to light. The lower the number, the less sensitive it is and vice versa. The ISO range in the DSLR cameras we’ll be using usually goes from 100 to 6400, doubling as it goes (100 to 200 to 400 and so on until it gets up to 3200 and 6400).
It follows, then, that you will need to adjust the ISO for the available lighting conditions.
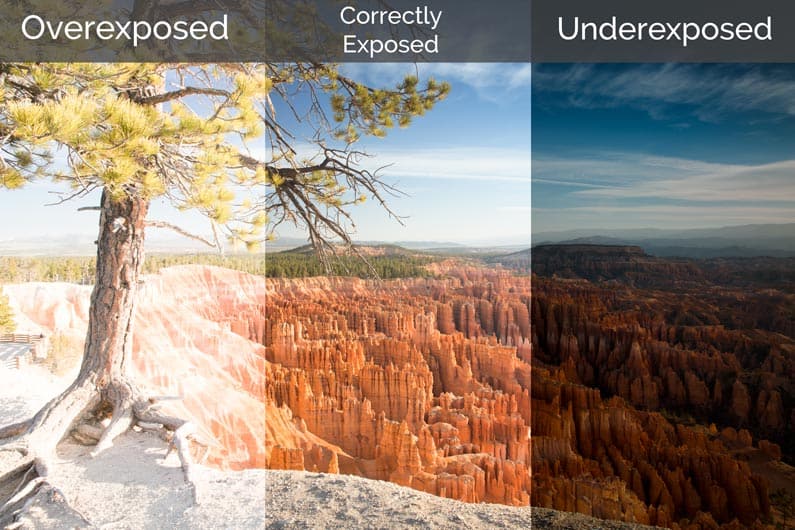
In broad daylight, there is plenty of light to work with, so a low ISO will be all you need. If you let in too much light, the image will be overexposed.
If you are shooting indoors in artificial light, you will need a much higher ISO — but be aware that you sacrifice image quality as you get up to the highest ISO settings, where you will start to notice a grainy quality. So before you reach for the dial to crank the ISO up to 3200, try letting a bit more light into the camera using a wider (lower) aperture or slower shutter speed.
 Credit: here
Shutter Speed
Shutter speed is probably the simplest setting to understand. It refers to how long the camera’s shutter stays open. The longer the shutter is open, the more light is able to come in, and vice versa.

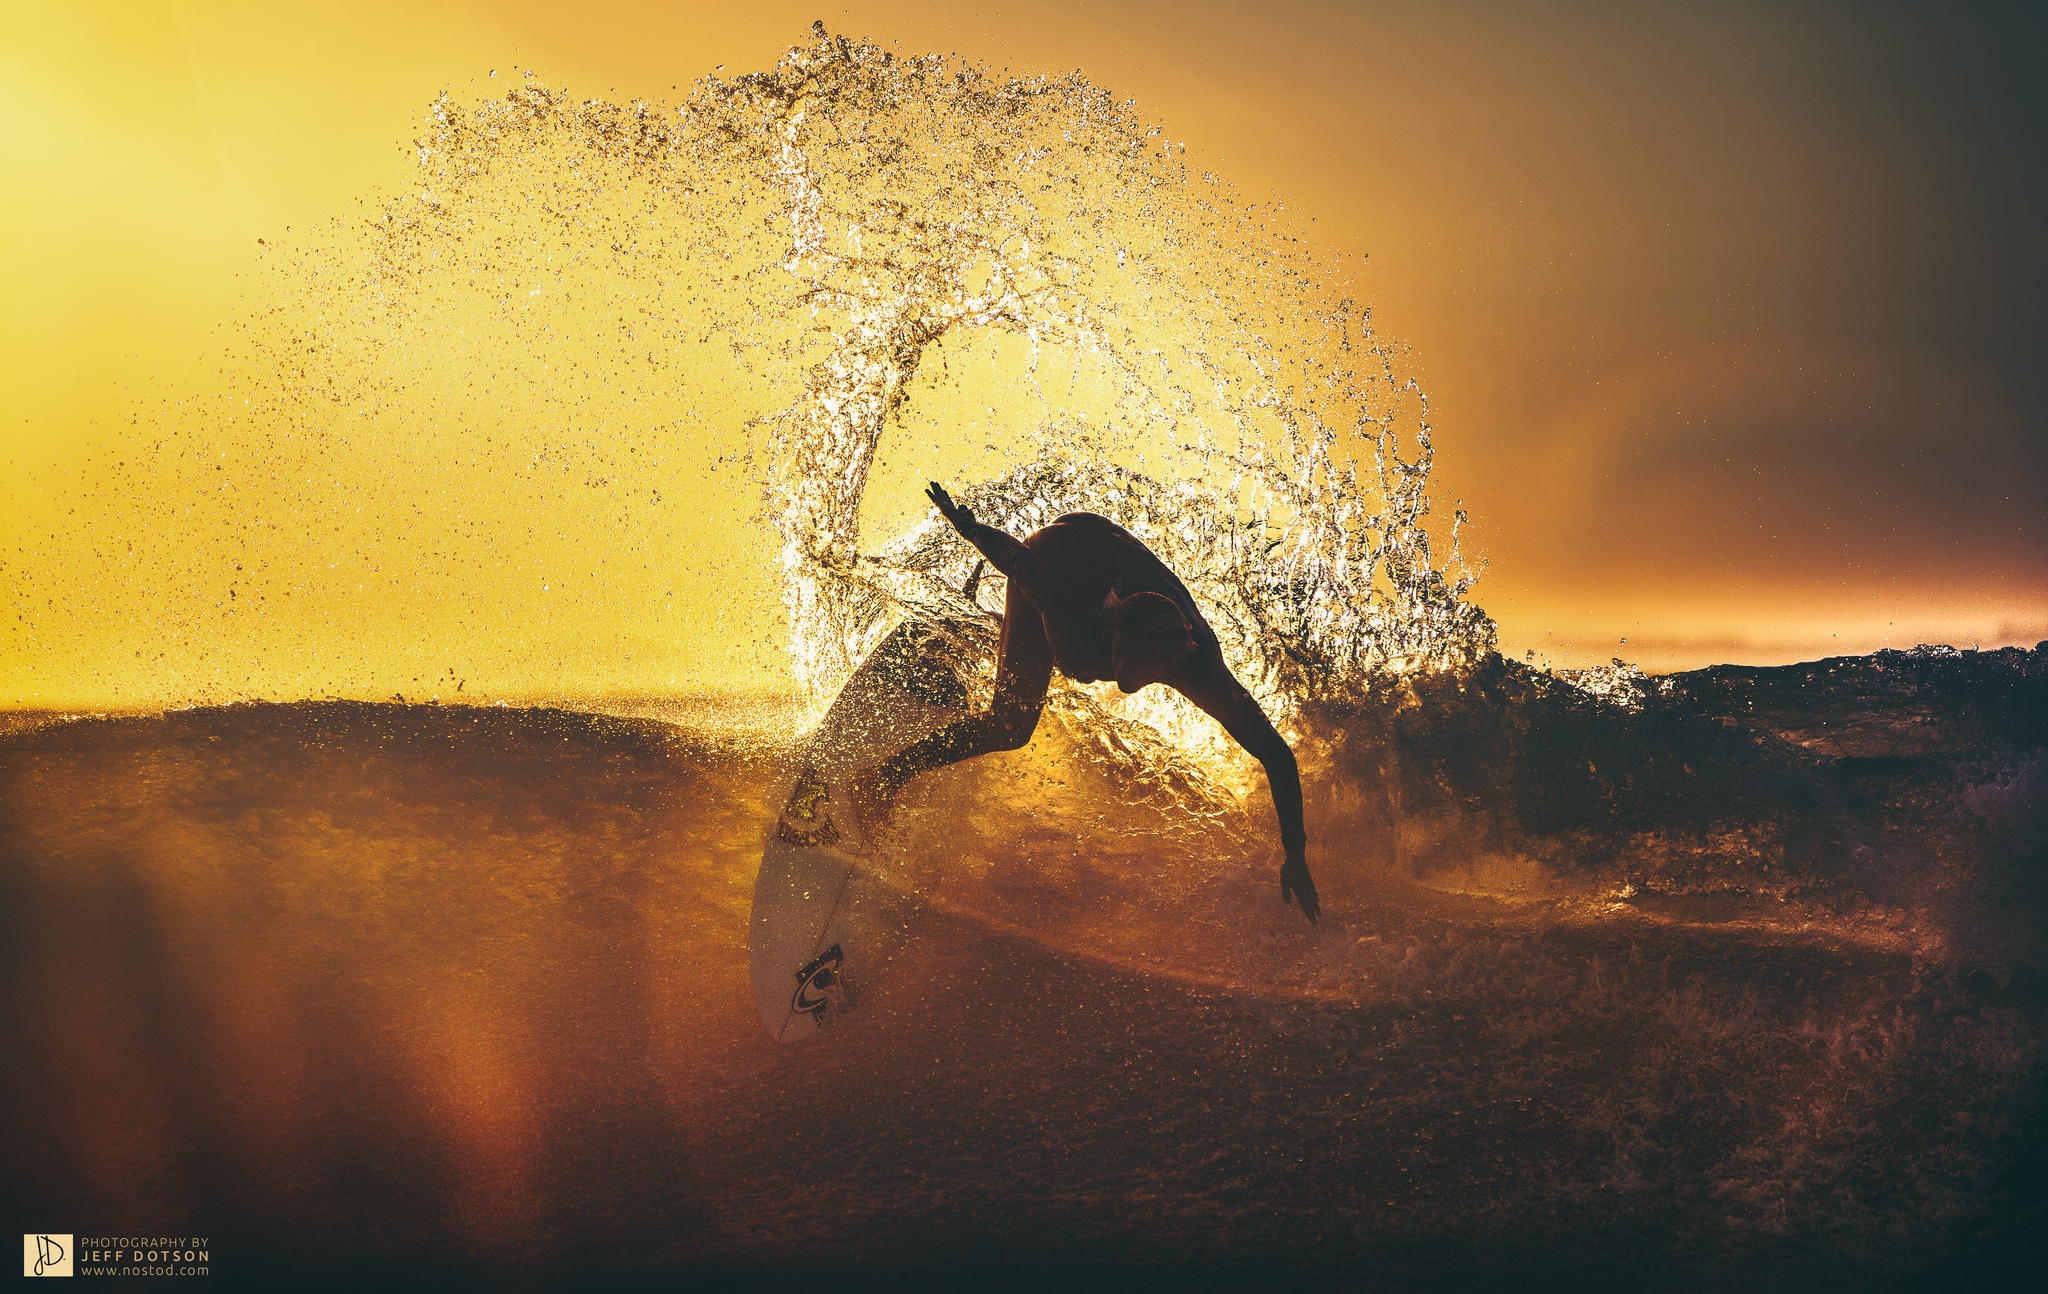
A faster shutter speed would have captured the aqua-colored glove crisply. Using a slower shutter speed can create a sense of motion. Credit: Lindsay Armstrong
A long exposure can allow you to capture objects in motion in an artistically blurred fashion — or it can capture unwanted camera shake if you’re shooting without a tripod.

Sports photographers trying to capture crisp images, for example, are likely to rely on a fast shutter speed because their subjects are moving so quickly.
Aperture
Aperture refers to the opening in the lens. The wider it is, the more light it lets in. Somewhat confusingly, smaller numbers equate to wider aperture. Aperture is measured in “f-stops” and lenses can have different ranges. The wide-angle lenses that come with the journalism department’s DSLR cameras typically range from about f/3.5 (the widest) to f/22 (letting in the least amount of light).


A low aperture, in addition to helping you shoot in low-light conditions, allows you to capture a shallow depth of field. This refers to the effect where an object in the foreground is in focus but the background is blurred (or vice versa).
This also allows you to play with the bokeh effect.
A high aperture, on the other hand, allows to retain detail at every layer of the image, which can be vital in terms of storytelling. If there are protest signs in the background, for instance, and your camera lens is focused on a police officer in the foreground, a shallow depth of field means we may not be able to tell what the signs say. In such a situation, you might want a flatter image, with a deeper depth of field.


Aperture Priority vs. Shutter Priority vs. Manual
As soon as you’re ready to leave the comfort of Auto behind, the next logical step is to experiment with Aperture Priority and Shutter Priority shooting modes (Av and Tv on your DSLR dial). These settings operate exactly the way their names suggest. You decide whether aperture or shutter speed is more important to the image you want to make and the camera will automatically adjust the other one for the correct exposure.
So if you’re shooting a soccer game, for instance, shutter speed is probably more important. There will be a lot of movement and you’ll want to capture the action crisply. But if you’re taking a portrait and you want to blur the background to allow your subject’s face to stand out, aperture priority is the obvious choice.
In both of these shooting modes, you still have to control for ISO, but they make your job a little bit easier than if you were to jump straight from Auto to Manual. Going back to our analogy, you only have to worry about two out of the three elements that fill the bucket. But once you’ve mastered Aperture Priority and Shutter Priority, you’ll be ready to take the final leap to Manual.

Screenshot. Credit: CameraSim
The best way to learn all of this is by doing it, so please don’t be shy about checking out camera equipment. In the meantime, a good way to get some practice juggling all the settings is by using CameraSim, an online DSLR simulator. It allows you to play with camera settings, lighting conditions, distance from subject, and a few other factors that go into taking a picture, and to check your best guesses against the resulting image.
Next: How to construct a photo essay
A photo essay is a thoroughly reported story, told in well-composed and curated images and captions. Ideally, there should be a mix of images so that the eye is always looking as something new as the viewer clicks or scrolls through: close-up shots, wide shots, portraits, colorful shots, bright shots, dark shots, action shots, etc. Intimacy is a powerful tool in these sorts of projects.
Unstoppable: Meet the Dancehall Queens of Brooklyn
Assignment
Pitch a photo essay. This could be a character-driven human interest story, or an event that is very visual in nature, or it could provide a local angle on an ongoing story. If stuck, ask yourself: What events are coming up that would make for cool photos? What are the big international, national or regional issues that have been making news of late?
Examples: Follow a family in Newark who are being affected by the water crisis. Photograph a small business owner who makes custom neon signs. Go to an arm-wrestling competition and document it.
A major caveat: While intimacy generally makes for more powerful images, be safe and use your judgment. Some of us will have access to stories and moments that others might not, whether due to age or gender or race, and some of us might be at risk attempting to cover stories that others would have no issues with.
Pitches will be due on Monday, September 9. The photo essays won’t be due until Wednesday, October 2.
Post your pitches on the class blog. Give a couple of paragraphs telling us who/what your photo essays will be covering, and why it is interesting or timely or relevant. Confirm that you actually have access to the story you want to do. And finally, tell us what kind of visuals you anticipate. Do yourself a favor and pitch a story that is visually interesting rather than trying to force an interesting but not-super-visual story to work for this assignment.