iMovie Instructions
Step 1: Create a project
Create a new iMovie project by clicking on the blue movie button as shown below.

In the Projects browser, click Create New→ Click Movie → Your new project opens, showing the browser, the viewer, and the timeline:

Step 2: Add photos
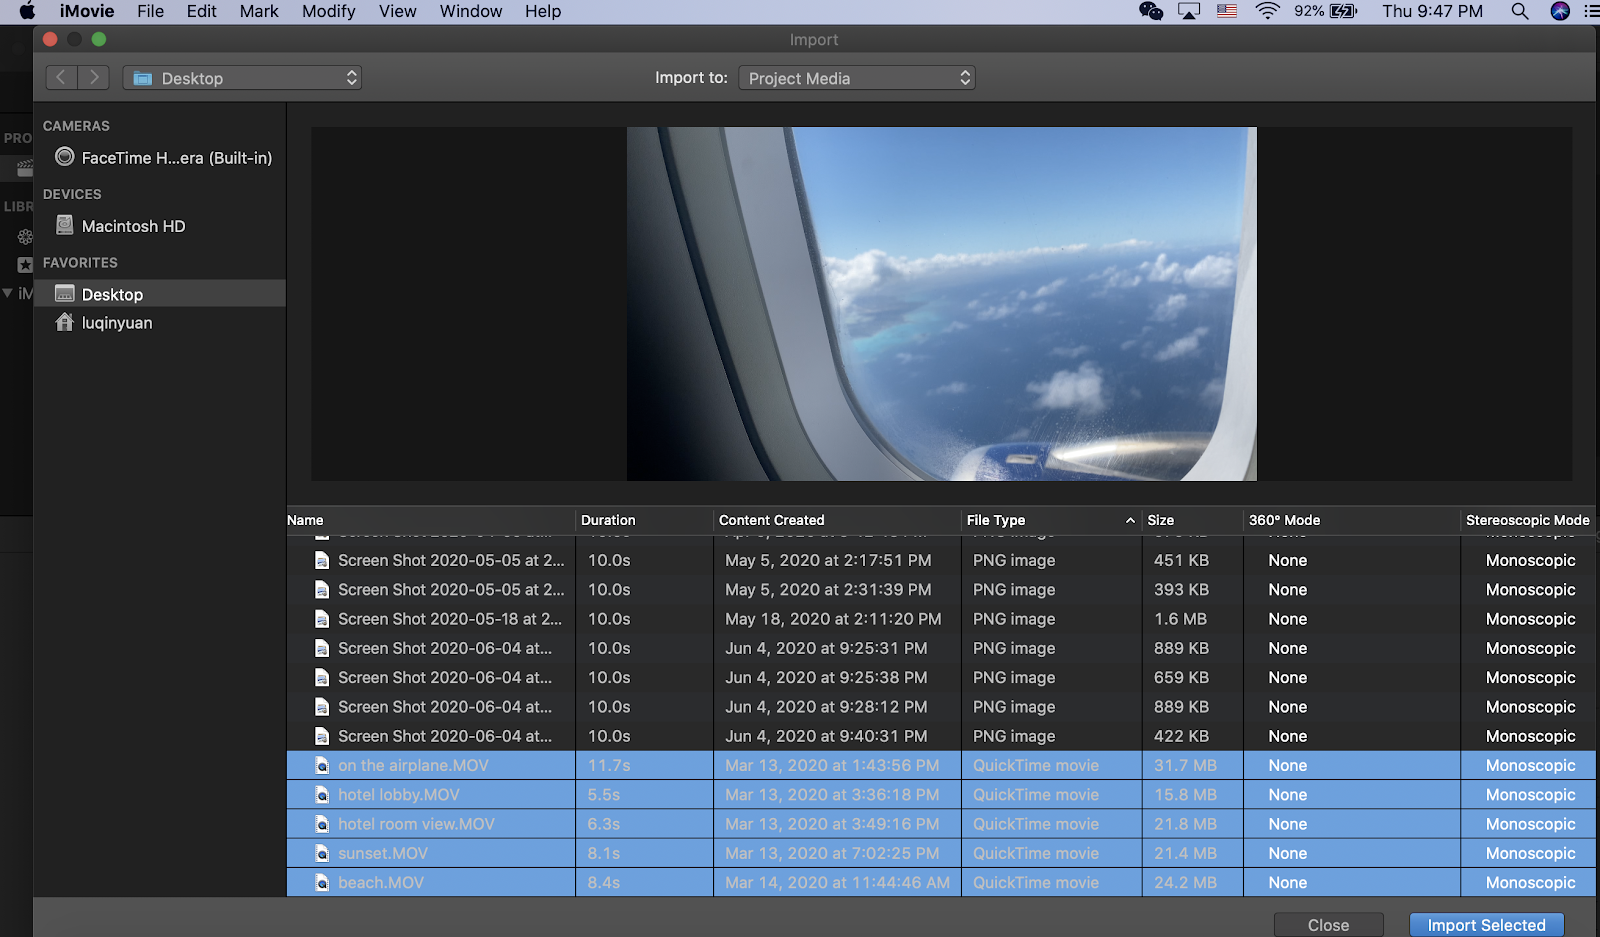
Add photos and videos to your project. You can use e.g. Google drive/ email/ AirDrop to send videos in your phone to your local first. Click “Import Media” → select clips from your local folder –>click “Import Selected”. The videos will show up in your media library.
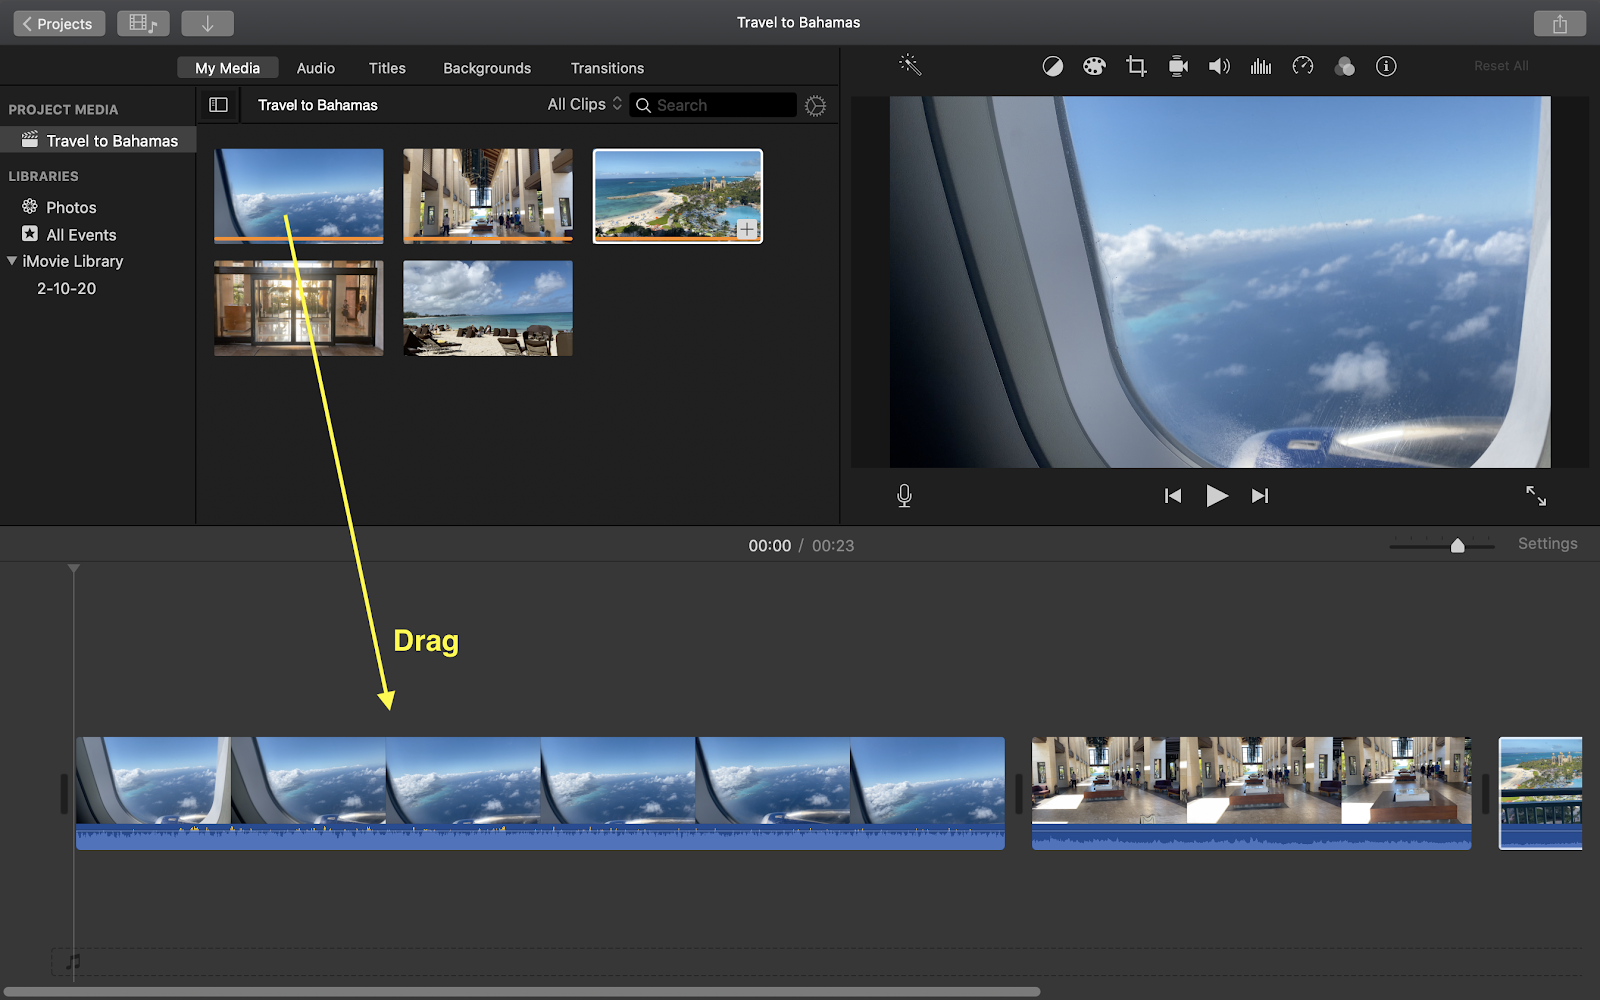
To start creating your movie, drag clips you’d like to use to the timeline of your project.
Step 3: Apply effects
To quickly improve the way a clip looks and sounds, select the clip in the timeline, then click the Enhance button above the viewer.


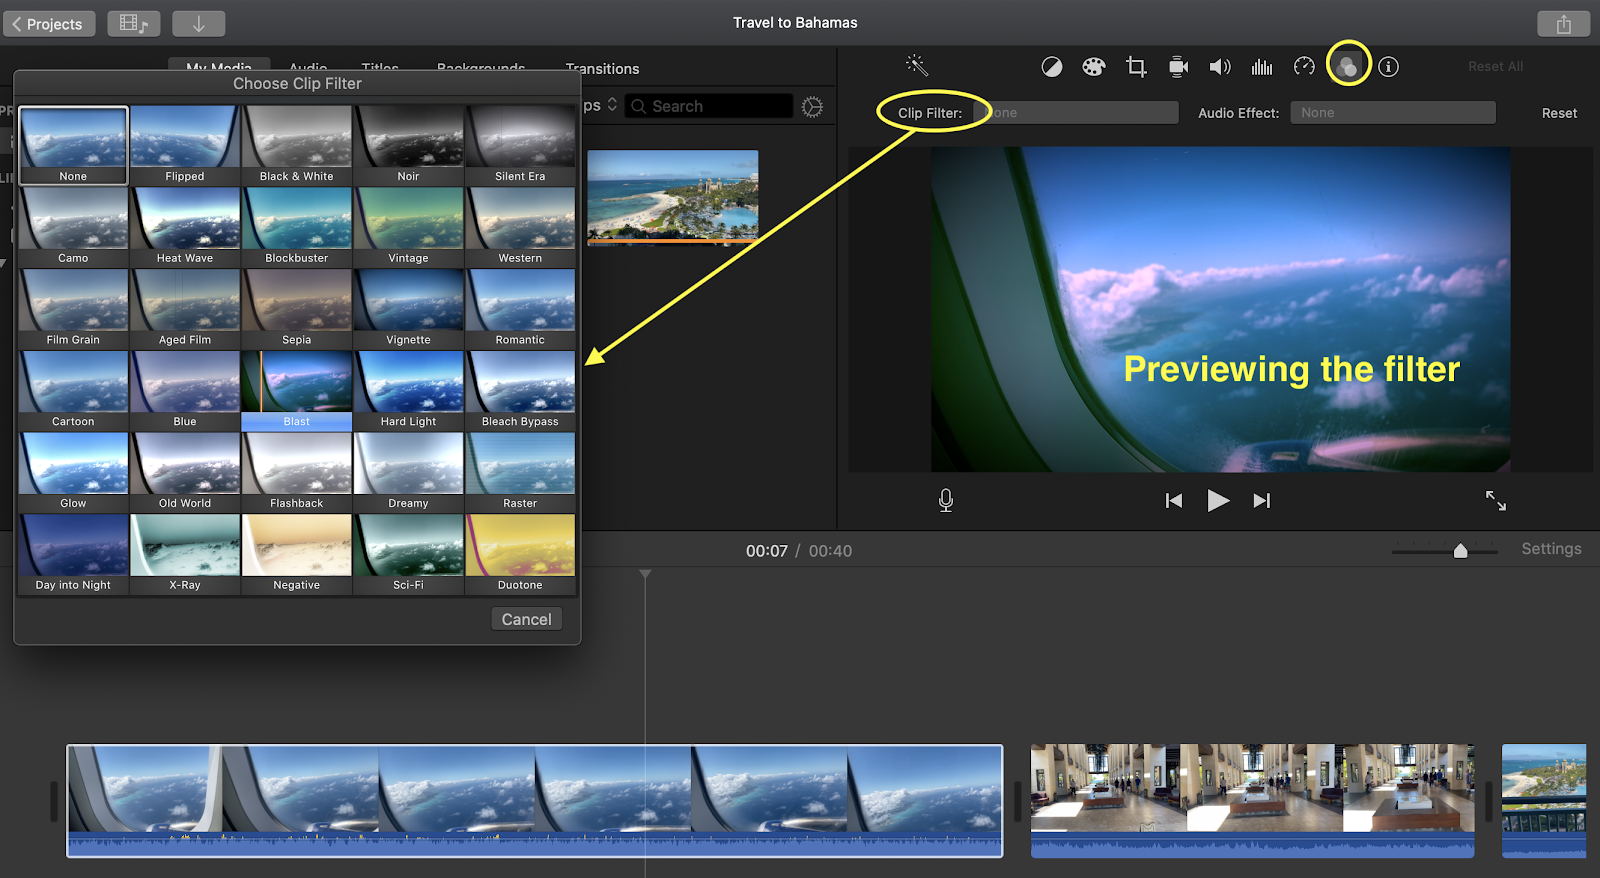
You can also use a preset filter as shown below. Select one or more clips in the browser or timeline, then click the Clip Filter and Audio Effects button above the viewer, then click a filter to apply it to the selected clips.
Step 4: Edit video clips
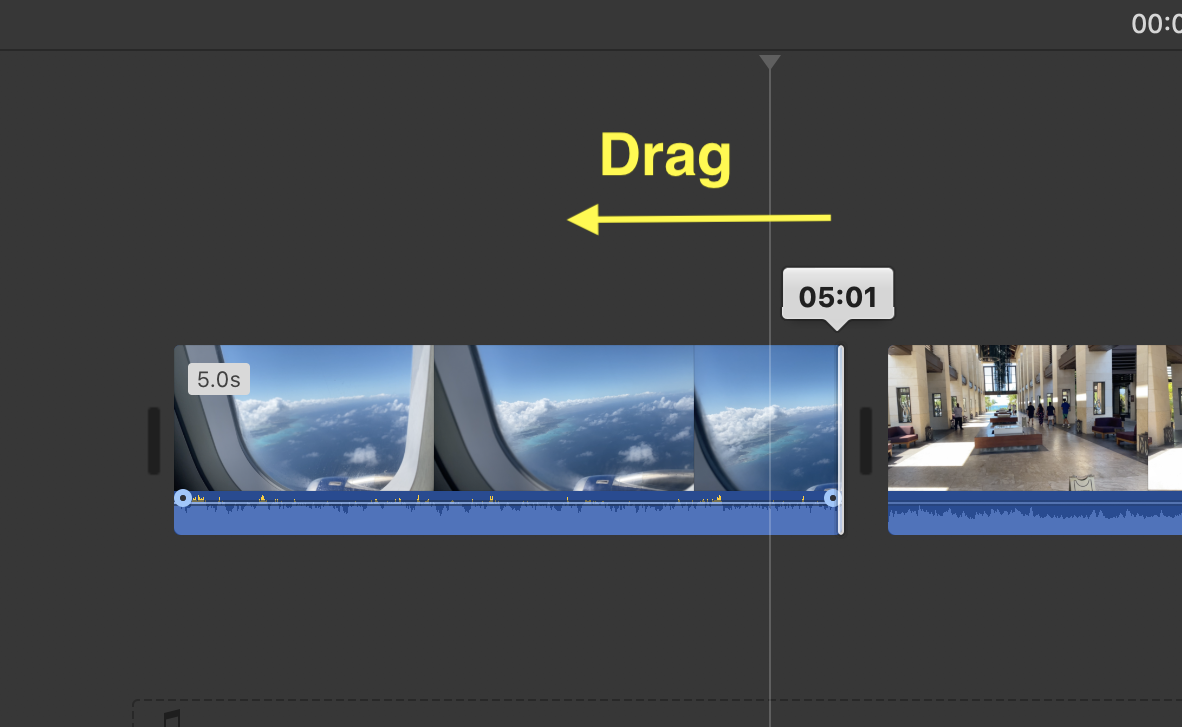
Make a clip shorter or longer by scrolling along the timeline to locate the clip you want to trim → hover your pointer over the beginning or end of the clip until your pointer becomes the clip trim tool → drag the edge of the clip to the length you want.
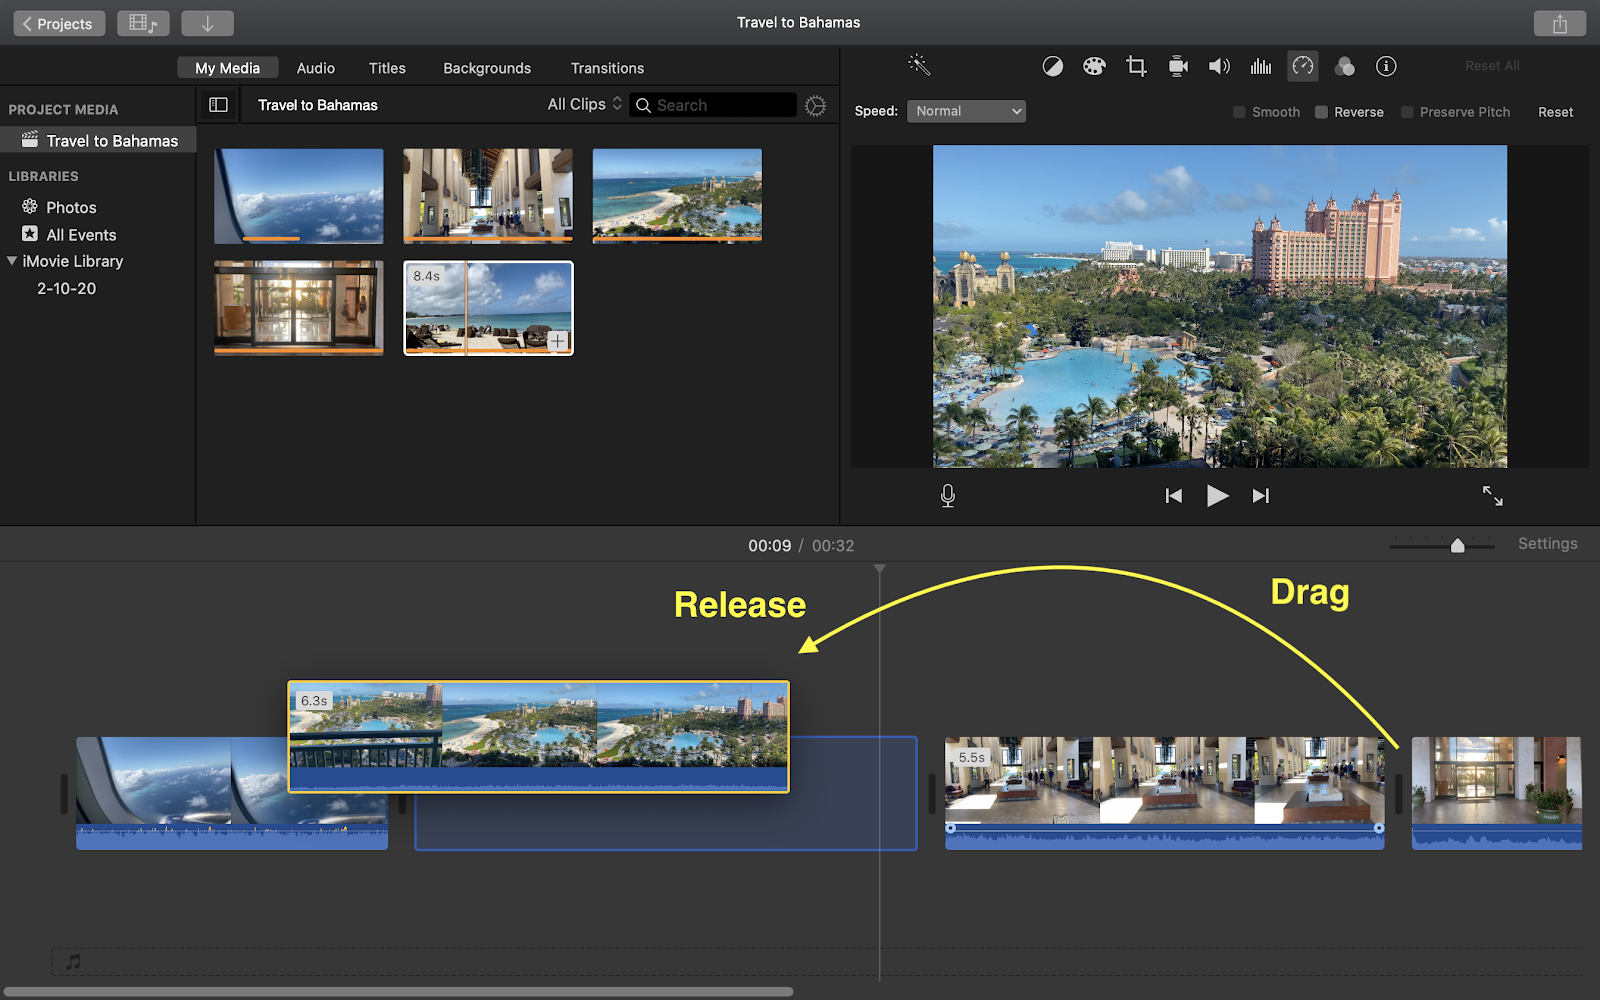
If you want the clip to appear earlier, drag the video clip to the left, then release it. If you want the clip to appear later, drag the video clip to the right, then release it. You can also move multiple clips at once.
Scroll in the timeline to position the playhead (the white line) where you want to split the clip → choose Modify → Split Clip or press Command–B.
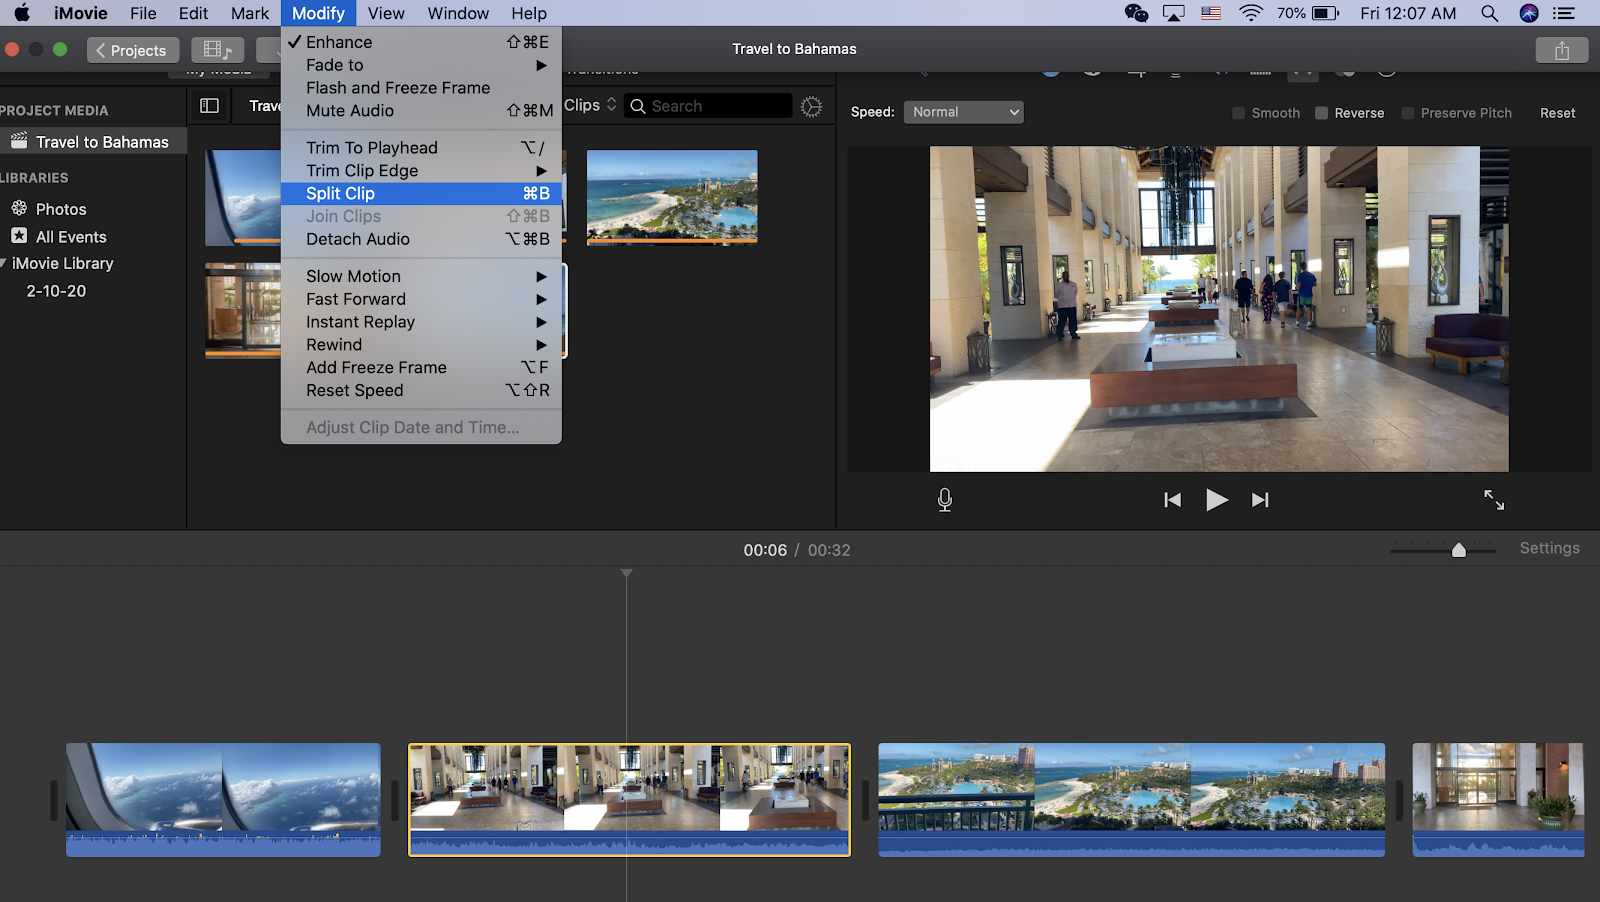
After you split the clip, you can add a transition like a cross-dissolve between the clips.
To slow down and speed up clips In the timeline, select the clip whose speed you want to change→ click the Speed button→ choose either Slow or Fast from the Speed pop-up menu

Step 5: Add music, sound effects, and voicecover
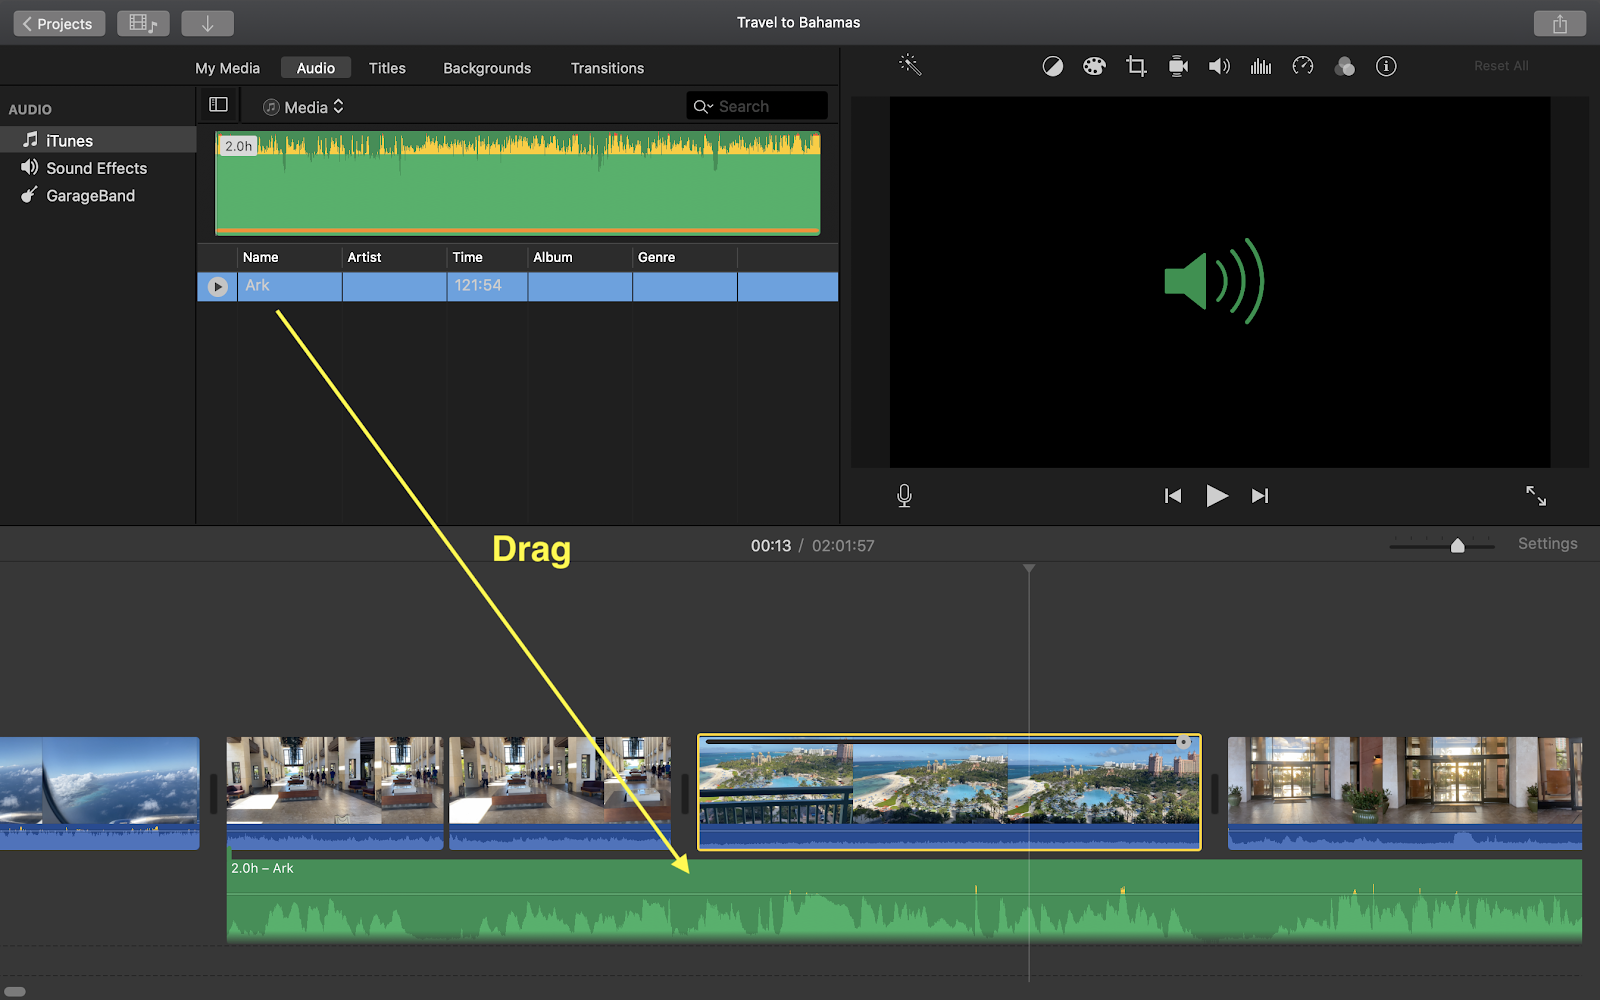
You can drag audio files right into your timeline from finder.
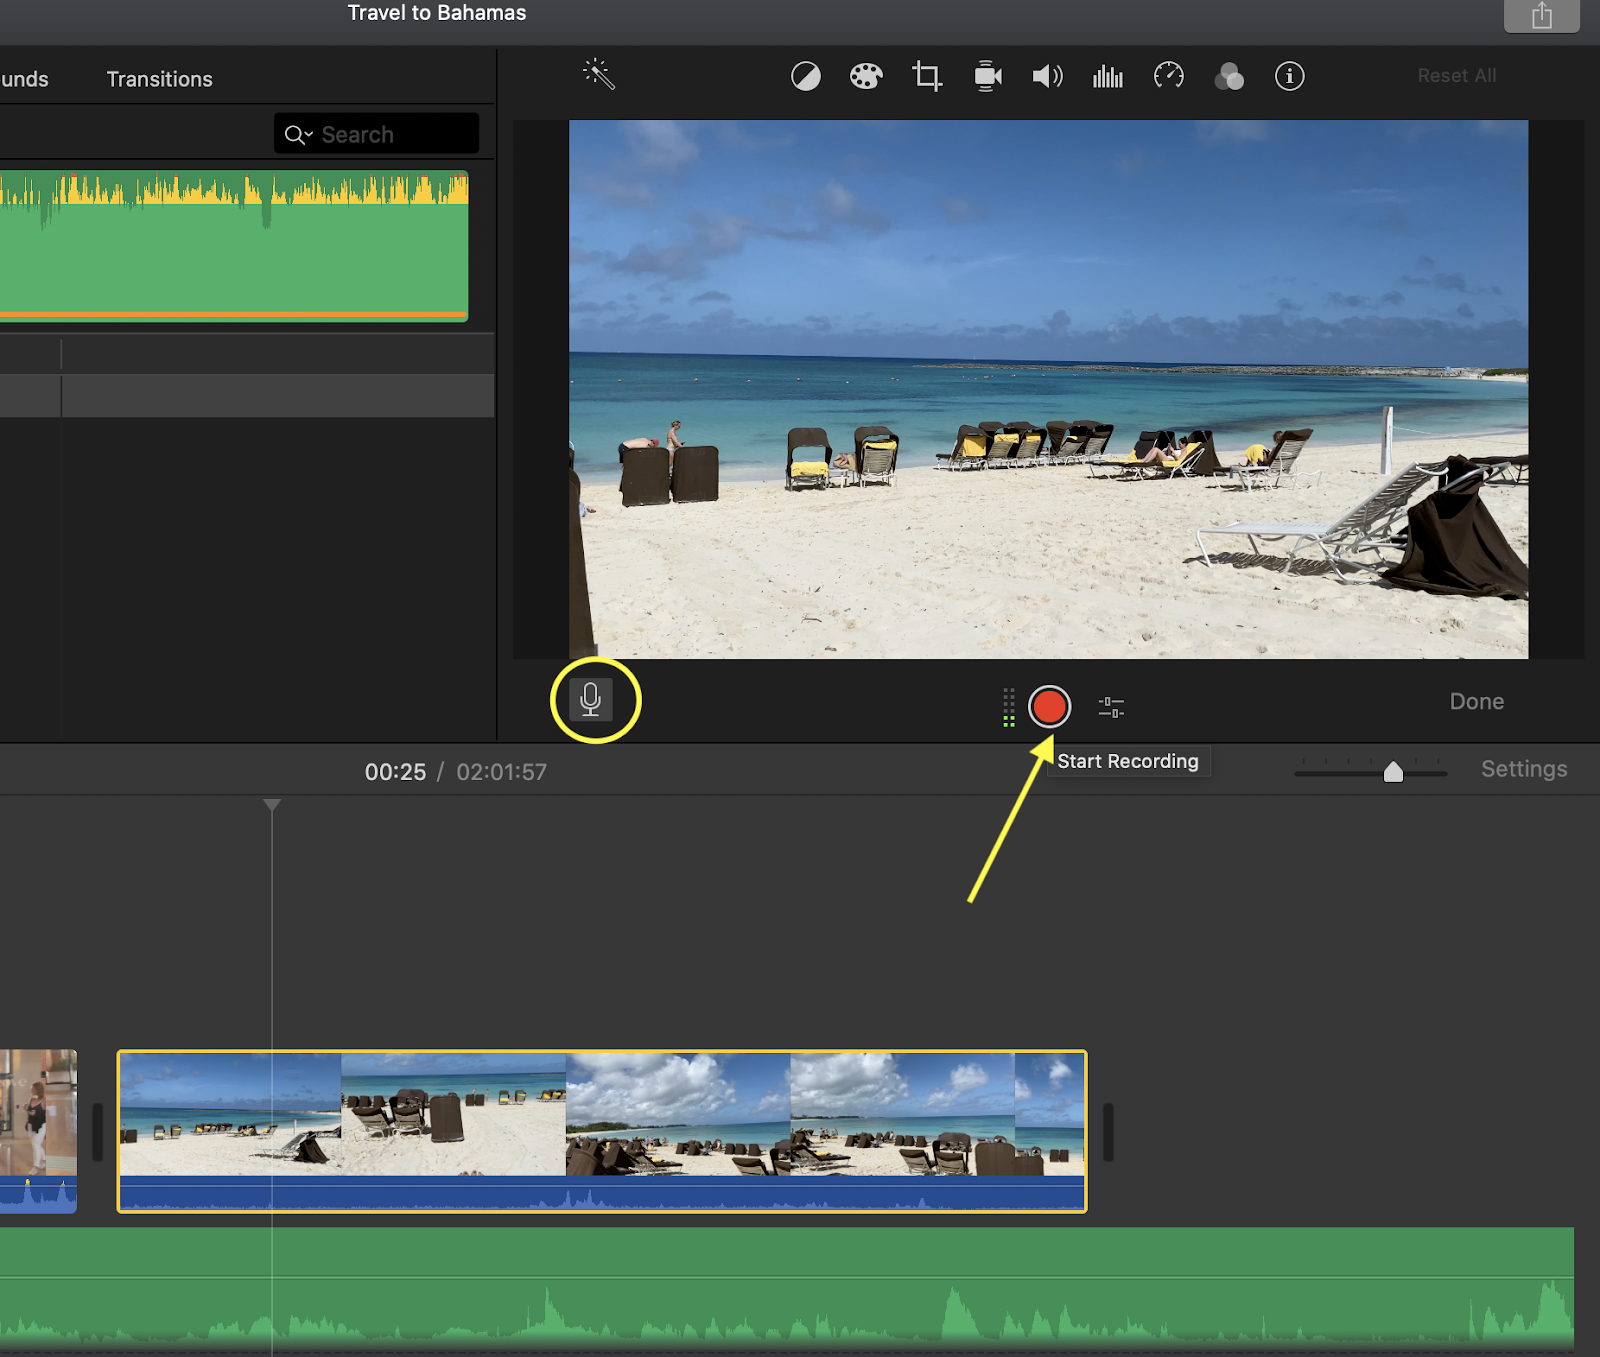
And if you want to add voiceover narration → Position the playhead where you want to start recording in the timeline, and click the Record Voiceover button → click the Record button
Step 6: Export your project
Click the Share button in the toolbar, and then click File to save to local

In the dialog that appears, you can set up the parameters.

How to edit video with iMovie
Here’s a quick run-through of the steps for desktop iMovie
| Introduction |
| Lesson One: Choosing Your Tools |
| Lesson Two: iMovie Instructions |
| Lesson Three: Windows Instructions |