Electronics Tools
TinkerCad Circuits
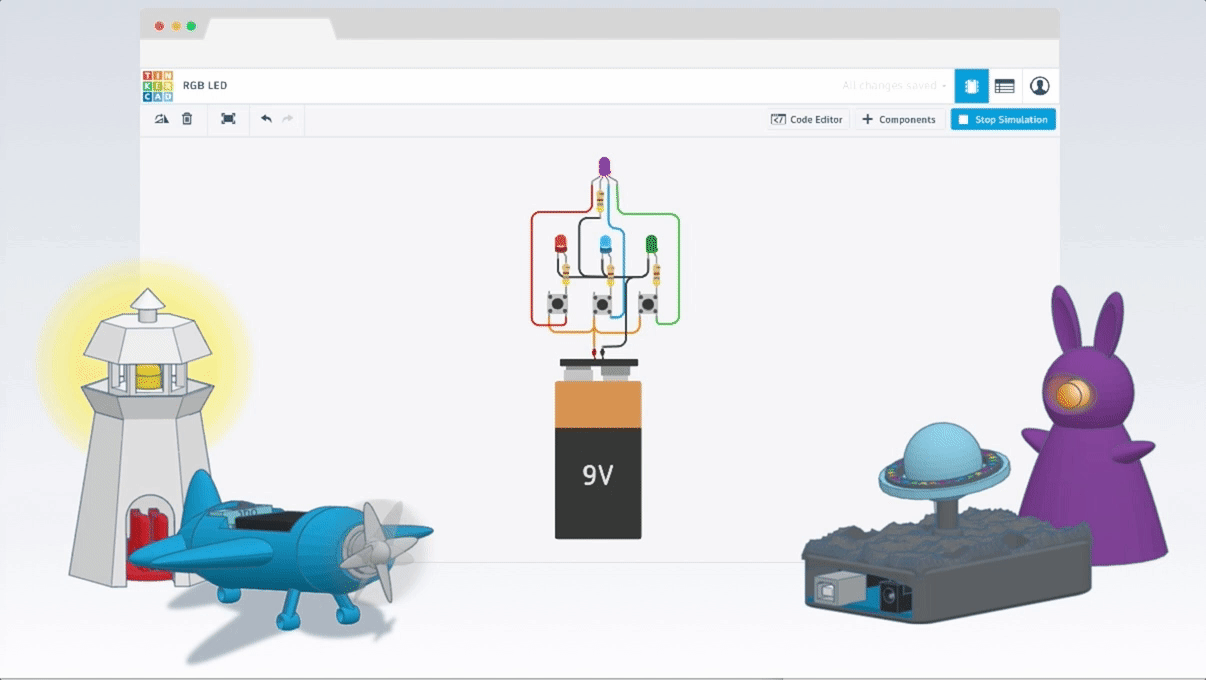
TinkerCad is a simple, online 3D design and 3D printing app for everyone. You can also use TinkerCad for electronics simulation using Circuits. Here is the link to Tinkercad website, you need to create an account and go to the “Circuits” tab to start your project. It will automatically save everything for you.

TinkerCad offers many benefits:
- Online: You do not need to install anything on your PC.
- Open Source: Free, no license needed, for everyone.
- Simulator: Tinkercad offers a good interface for designing and stimulate your project.
Check out these lessons from within Tinkercad for a more hands-on experience.
Arduino
Arduino is an open-source electronics platform based on easy-to-use hardware and software. Arduino boards are able to read inputs – light on a sensor, a finger on a button, or a Twitter message – and turn it into an output – activating a motor, turning on an LED, publishing something online.
You can tell your board what to do by sending a set of instructions to the microcontroller on the board. To do so you use the Arduino programming language (based on Wiring), and the Arduino Software (IDE).
To use Arduino IDE to write programs and upload them to your board, you need to download the Arduino IDE.

- Reset Button – This will restart any code that is loaded to the Arduino board
- AREF – Stands for “Analog Reference” and is used to set an external reference voltage
- Ground Pin – There are a few ground pins on the Arduino and they all work the same
- Digital Input/Output – Pins 0-13 can be used for digital input or output
- PWM – The pins marked with the (~) symbol can simulate analog output
- USB Connection – Used for powering up your Arduino and uploading sketches
- TX/RX – Transmit and receive data indication LEDs
- ATmega Microcontroller – This is the brains and is where the programs are stored
- Power LED Indicator – This LED lights up anytime the board is plugged in a power source
- Voltage Regulator – This controls the amount of voltage going into the Arduino board
- DC Power Barrel Jack – This is used for powering your Arduino with a power supply
- 3.3V Pin – This pin supplies 3.3 volts of power to your projects
- 5V Pin – This pin supplies 5 volts of power to your projects
- Ground Pins – There are a few ground pins on the Arduino and they all work the same
- Analog Pins – These pins can read the signal from an analog sensor and convert it to digital
How to do Basic Arduino Coding
Arduino programming language can be divided into three main parts: functions, values (variables and constants), and structure.
Functions: For controlling the Arduino board and performing computations. There are so many build-in/ library functions out there, you will not be able to remember all of them. Here are some examples of common Arduino functions:
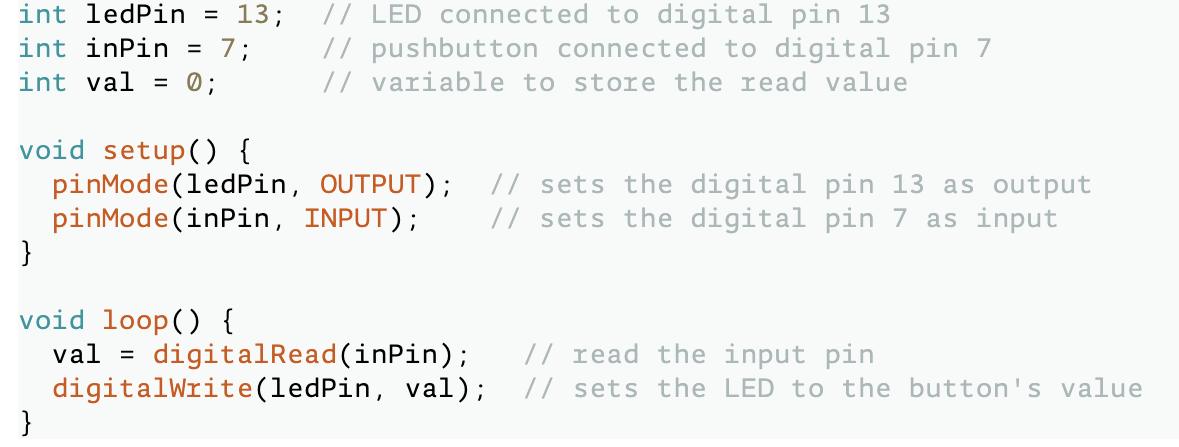
digitalRead() Reads the value from a specified digital pin, either HIGH or LOW.
Syntax: digitalRead(pin)
Parameter: pin: the Arduino pin number you want to read
Returns: HIGH or LOW
digitalWrite()Write a HIGH or a LOW value to a digital pin.
If the pin has been configured as an OUTPUT with pinMode(), its voltage will be set to the corresponding value: 5V (or 3.3V on 3.3V boards) for HIGH, 0V (ground) for LOW.
If the pin is configured as an INPUT, digitalWrite() will enable (HIGH) or disable (LOW) the internal pullup on the input pin. It is recommended to set the pinMode() to INPUT_PULLUP to enable the internal pull-up resistor. See the Digital Pins tutorial for more information.
If you do not set the pinMode() to OUTPUT, and connect an LED to a pin, when calling digitalWrite(HIGH), the LED may appear dim. Without explicitly setting pinMode(), digitalWrite() will have enabled the internal pull-up resistor, which acts like a large current-limiting resistor.
Syntax: digitalWrite(pin, value)
Returns: Nothing
pinMode()Configures the specified pin to behave either as an input or an output.
Syntax: pinMode(pin, mode)
Returns: Nothing
Example code of the above 3 functions:
Variables: Arduino data types and constants. There are different variables data types, such as boolean, char, double, int, etc. Constants mean the value associate with them cannot be changed. Examples of constants are integer constants, HIGH | LOW, true | false, etc.
Structures: Sketch
Two basic Arduino sketches are setup() and loop()
setup()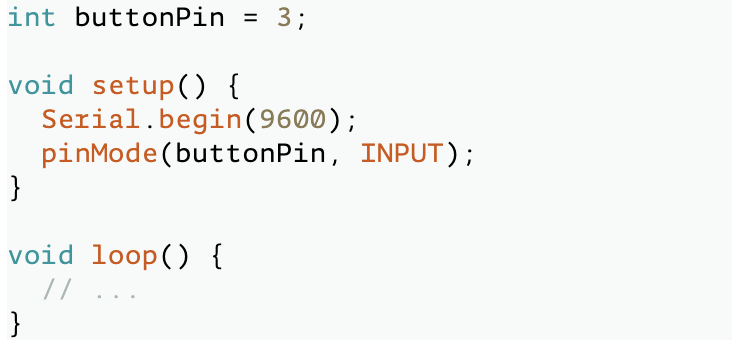
The setup() function is called when a sketch starts. Use it to initialize variables, pin modes, start using libraries, etc. The setup() function will only run once, after each powerup or reset of the Arduino board.
loop()After creating a setup() function, which initializes and sets the initial values, the loop() function does precisely what its name suggests, and loops consecutively, allowing your program to change and respond. Use it to actively control the Arduino board.
| Introduction |
| Lesson One: System Design |
| Lesson Two: Basic Circuitry Knowledge |
| Lesson Three: Electronics Tools |
| Lesson Four: Lighting an LED |
| Lesson Five: Tilt Switch |
| Lesson Six: Photoresistor and LED |
| Lesson Seven: Button with Piezo Speaker |
| Lesson Eight: Dimming an LED |
| Lesson Nine: Button Input for LED |
| Lesson Ten: Ultrasonic Sensor Alarm |
| Further Resources |